
Description
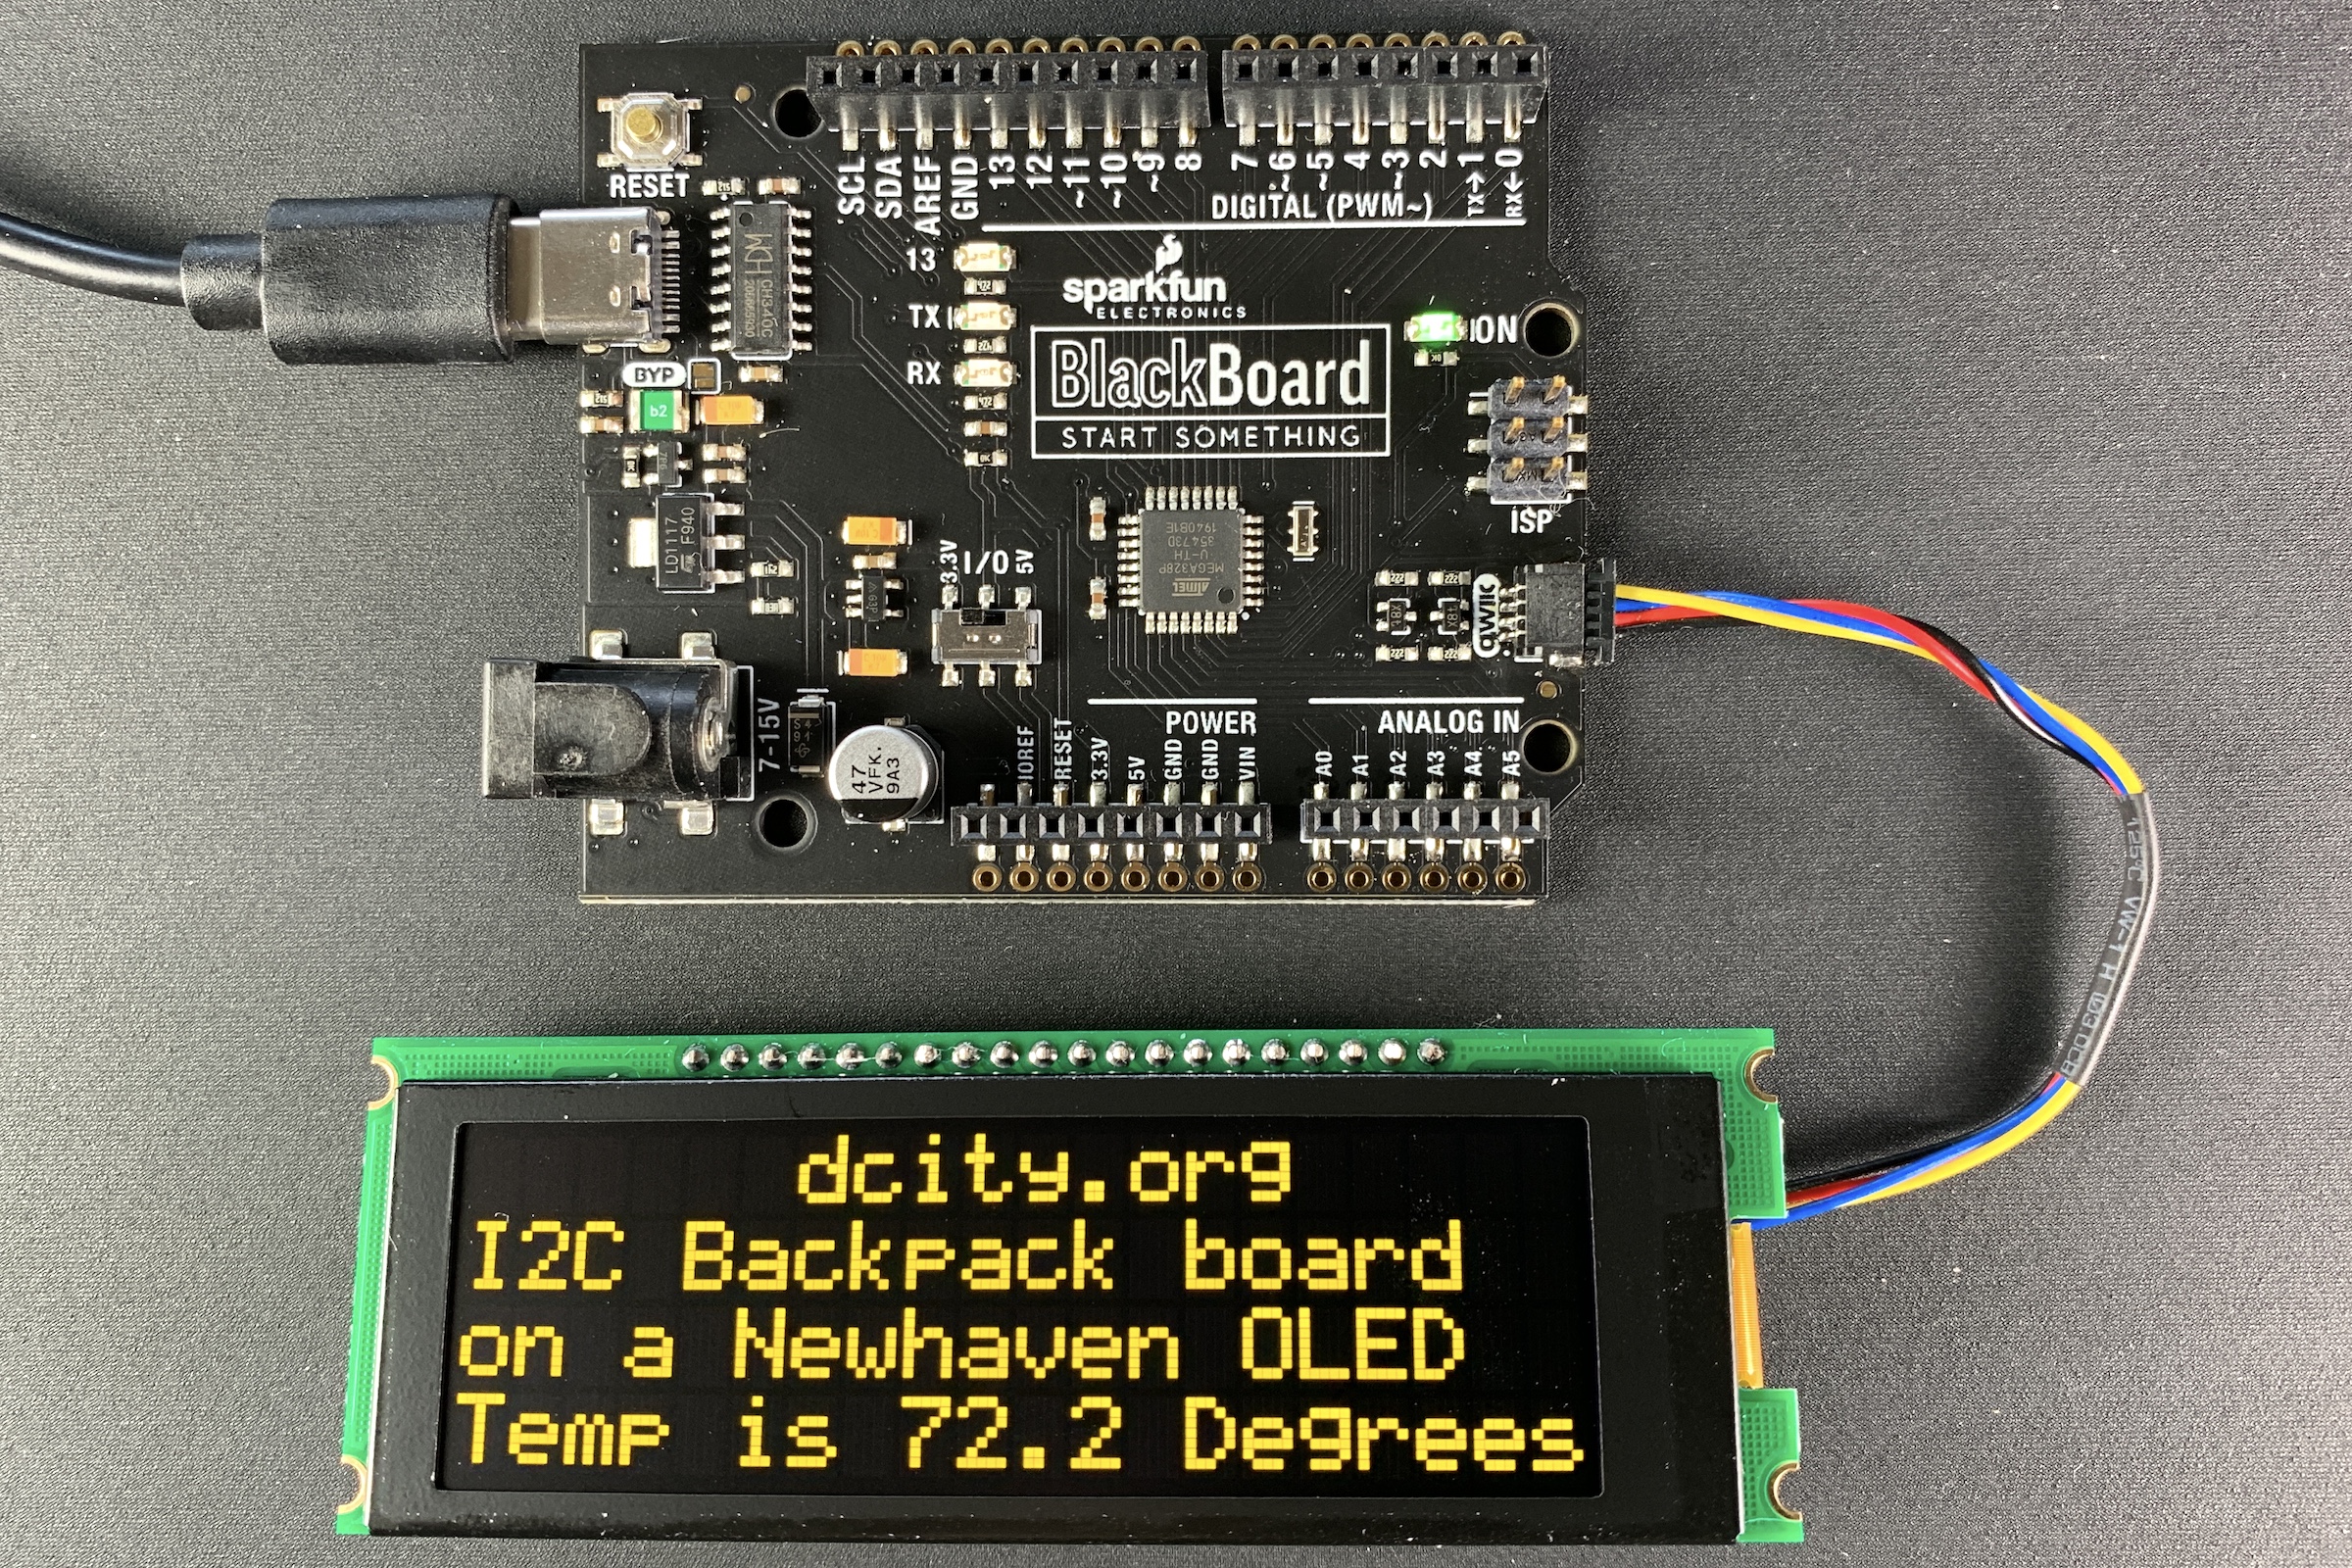
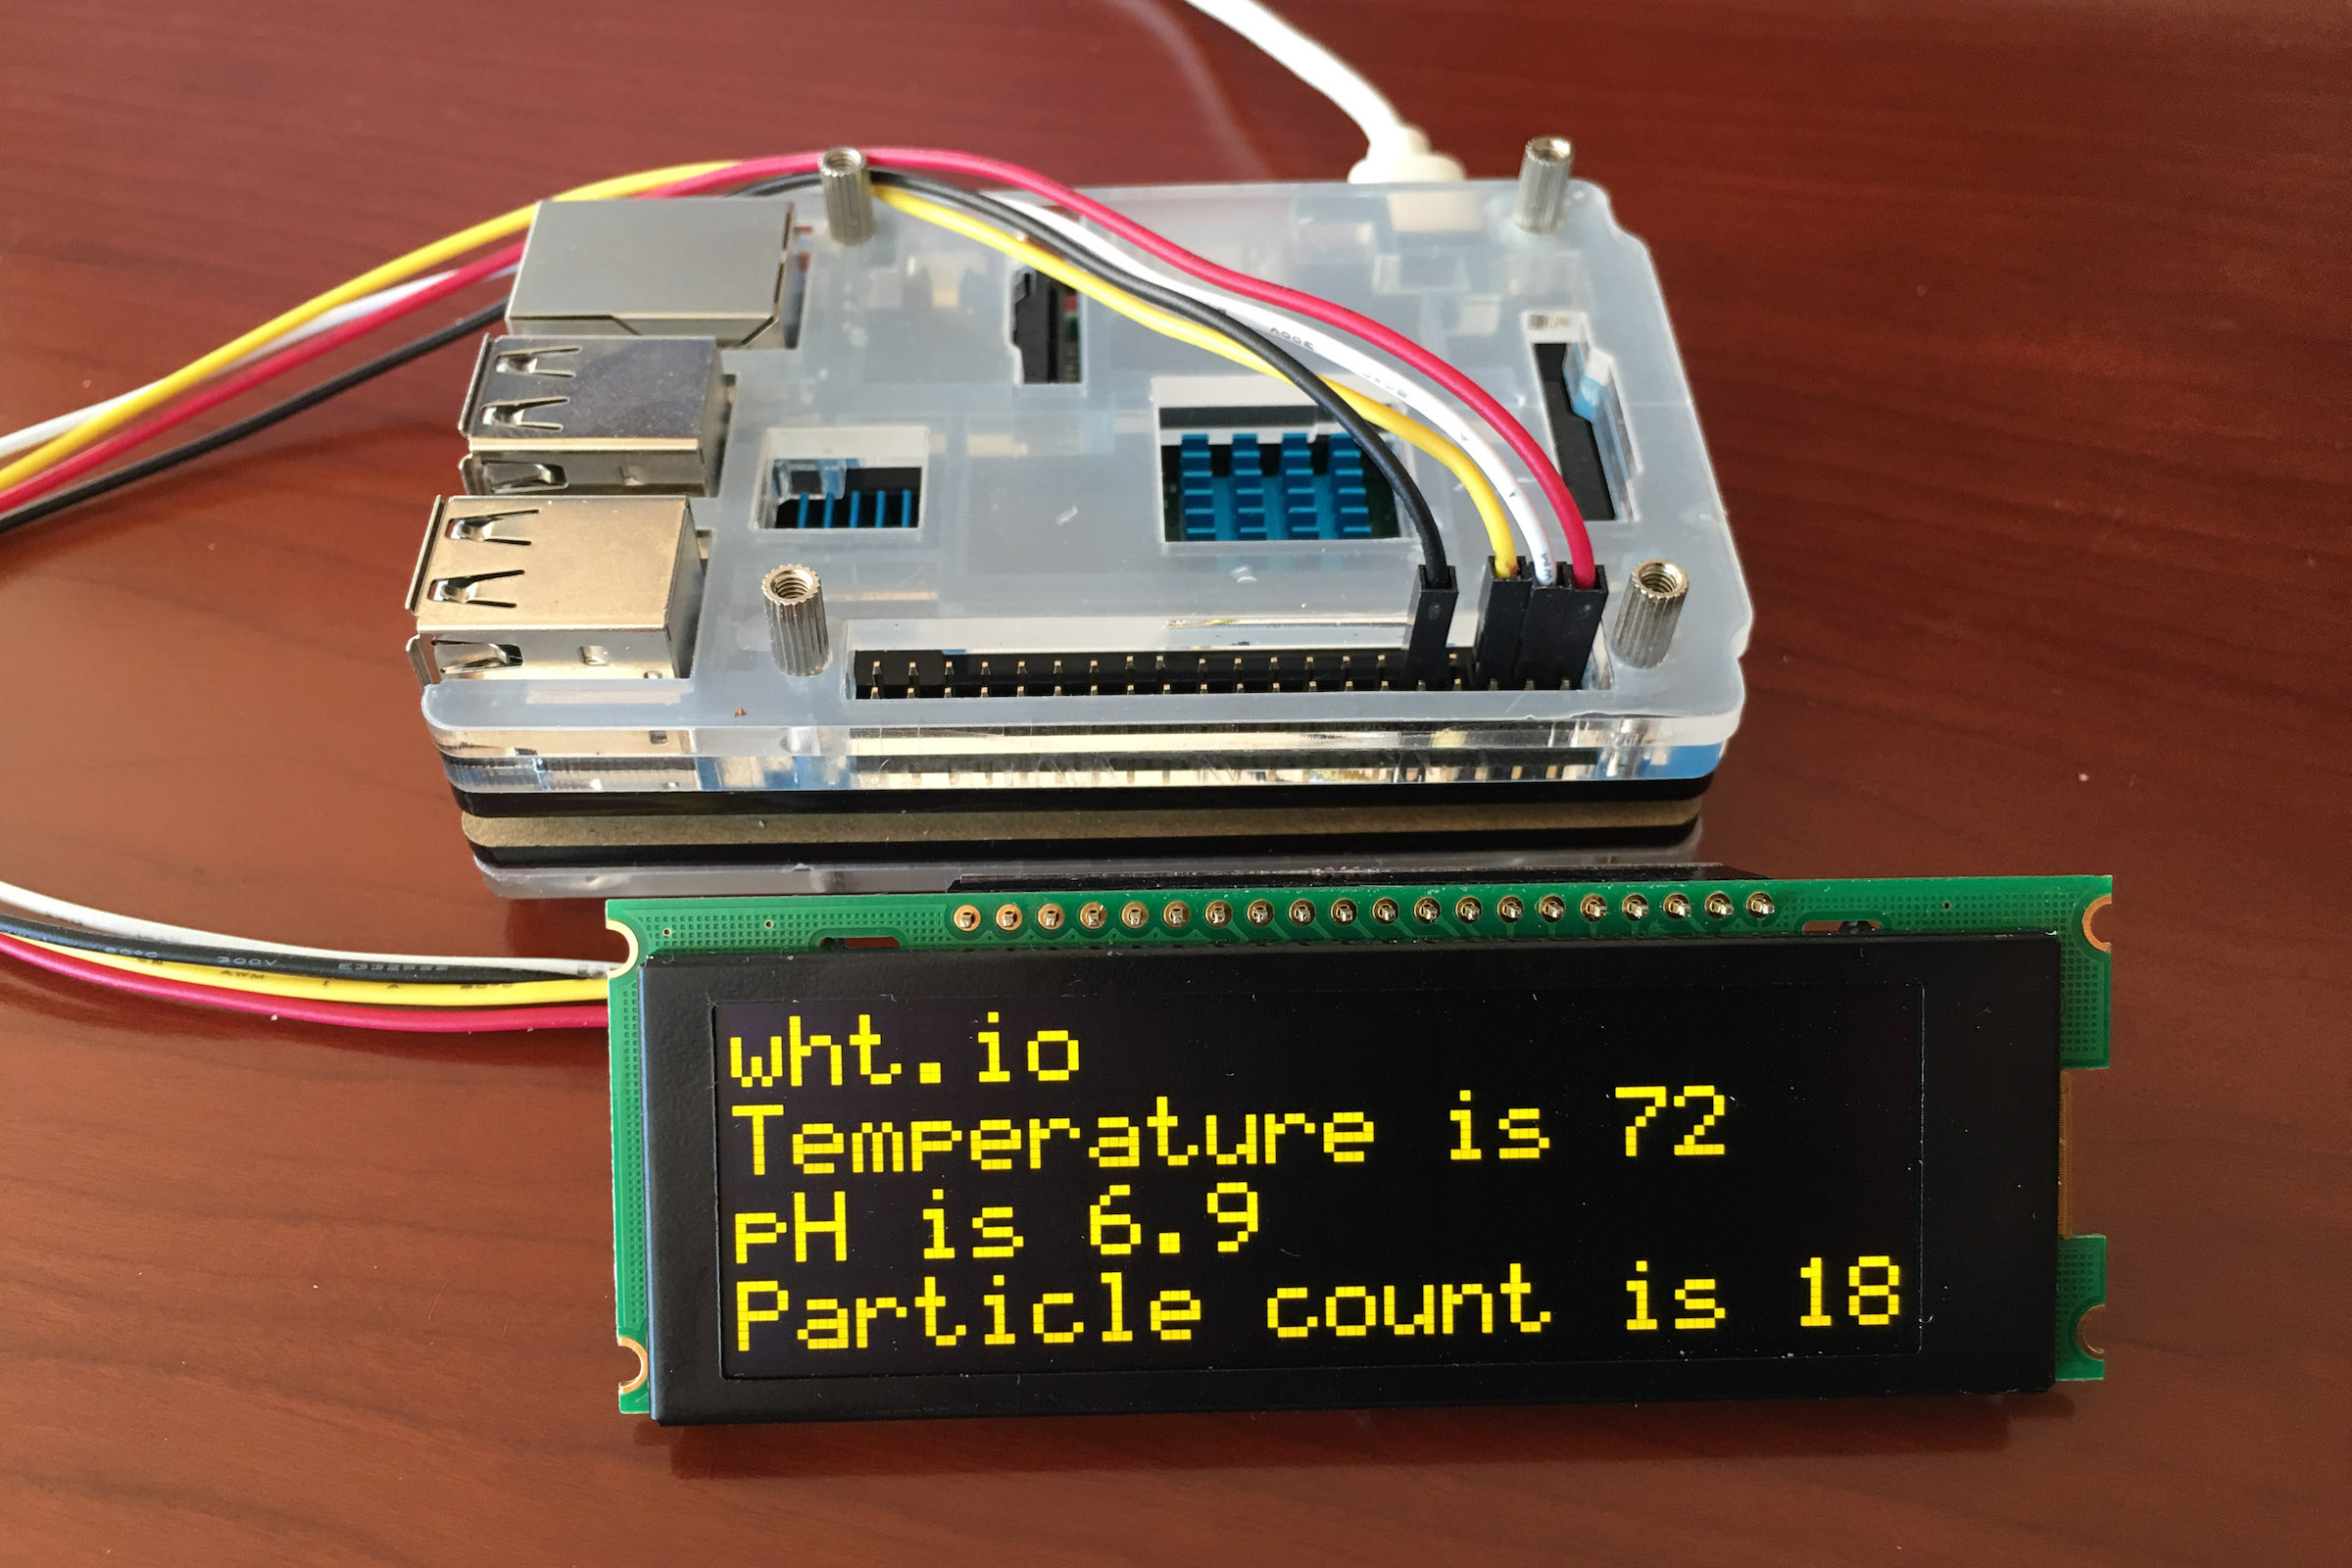
The I2cCharDisplay library works with Arduino, Particle (Photon, Electron, and Core) and Raspberry Pi boards and it provides many functions to communicate with OLED and LCD character display modules that use the I²C communication protocol.
- Github repository for the Arduino software library
- Github repository for the Particle software library
- Github repository for the Raspberry Pi software library
Compatible Hardware
LCD and OLED character displays come in a variety of sizes (e.g. 16×2, 20×2, 20×4, etc.) and are available in a variety of colors. This library requires that
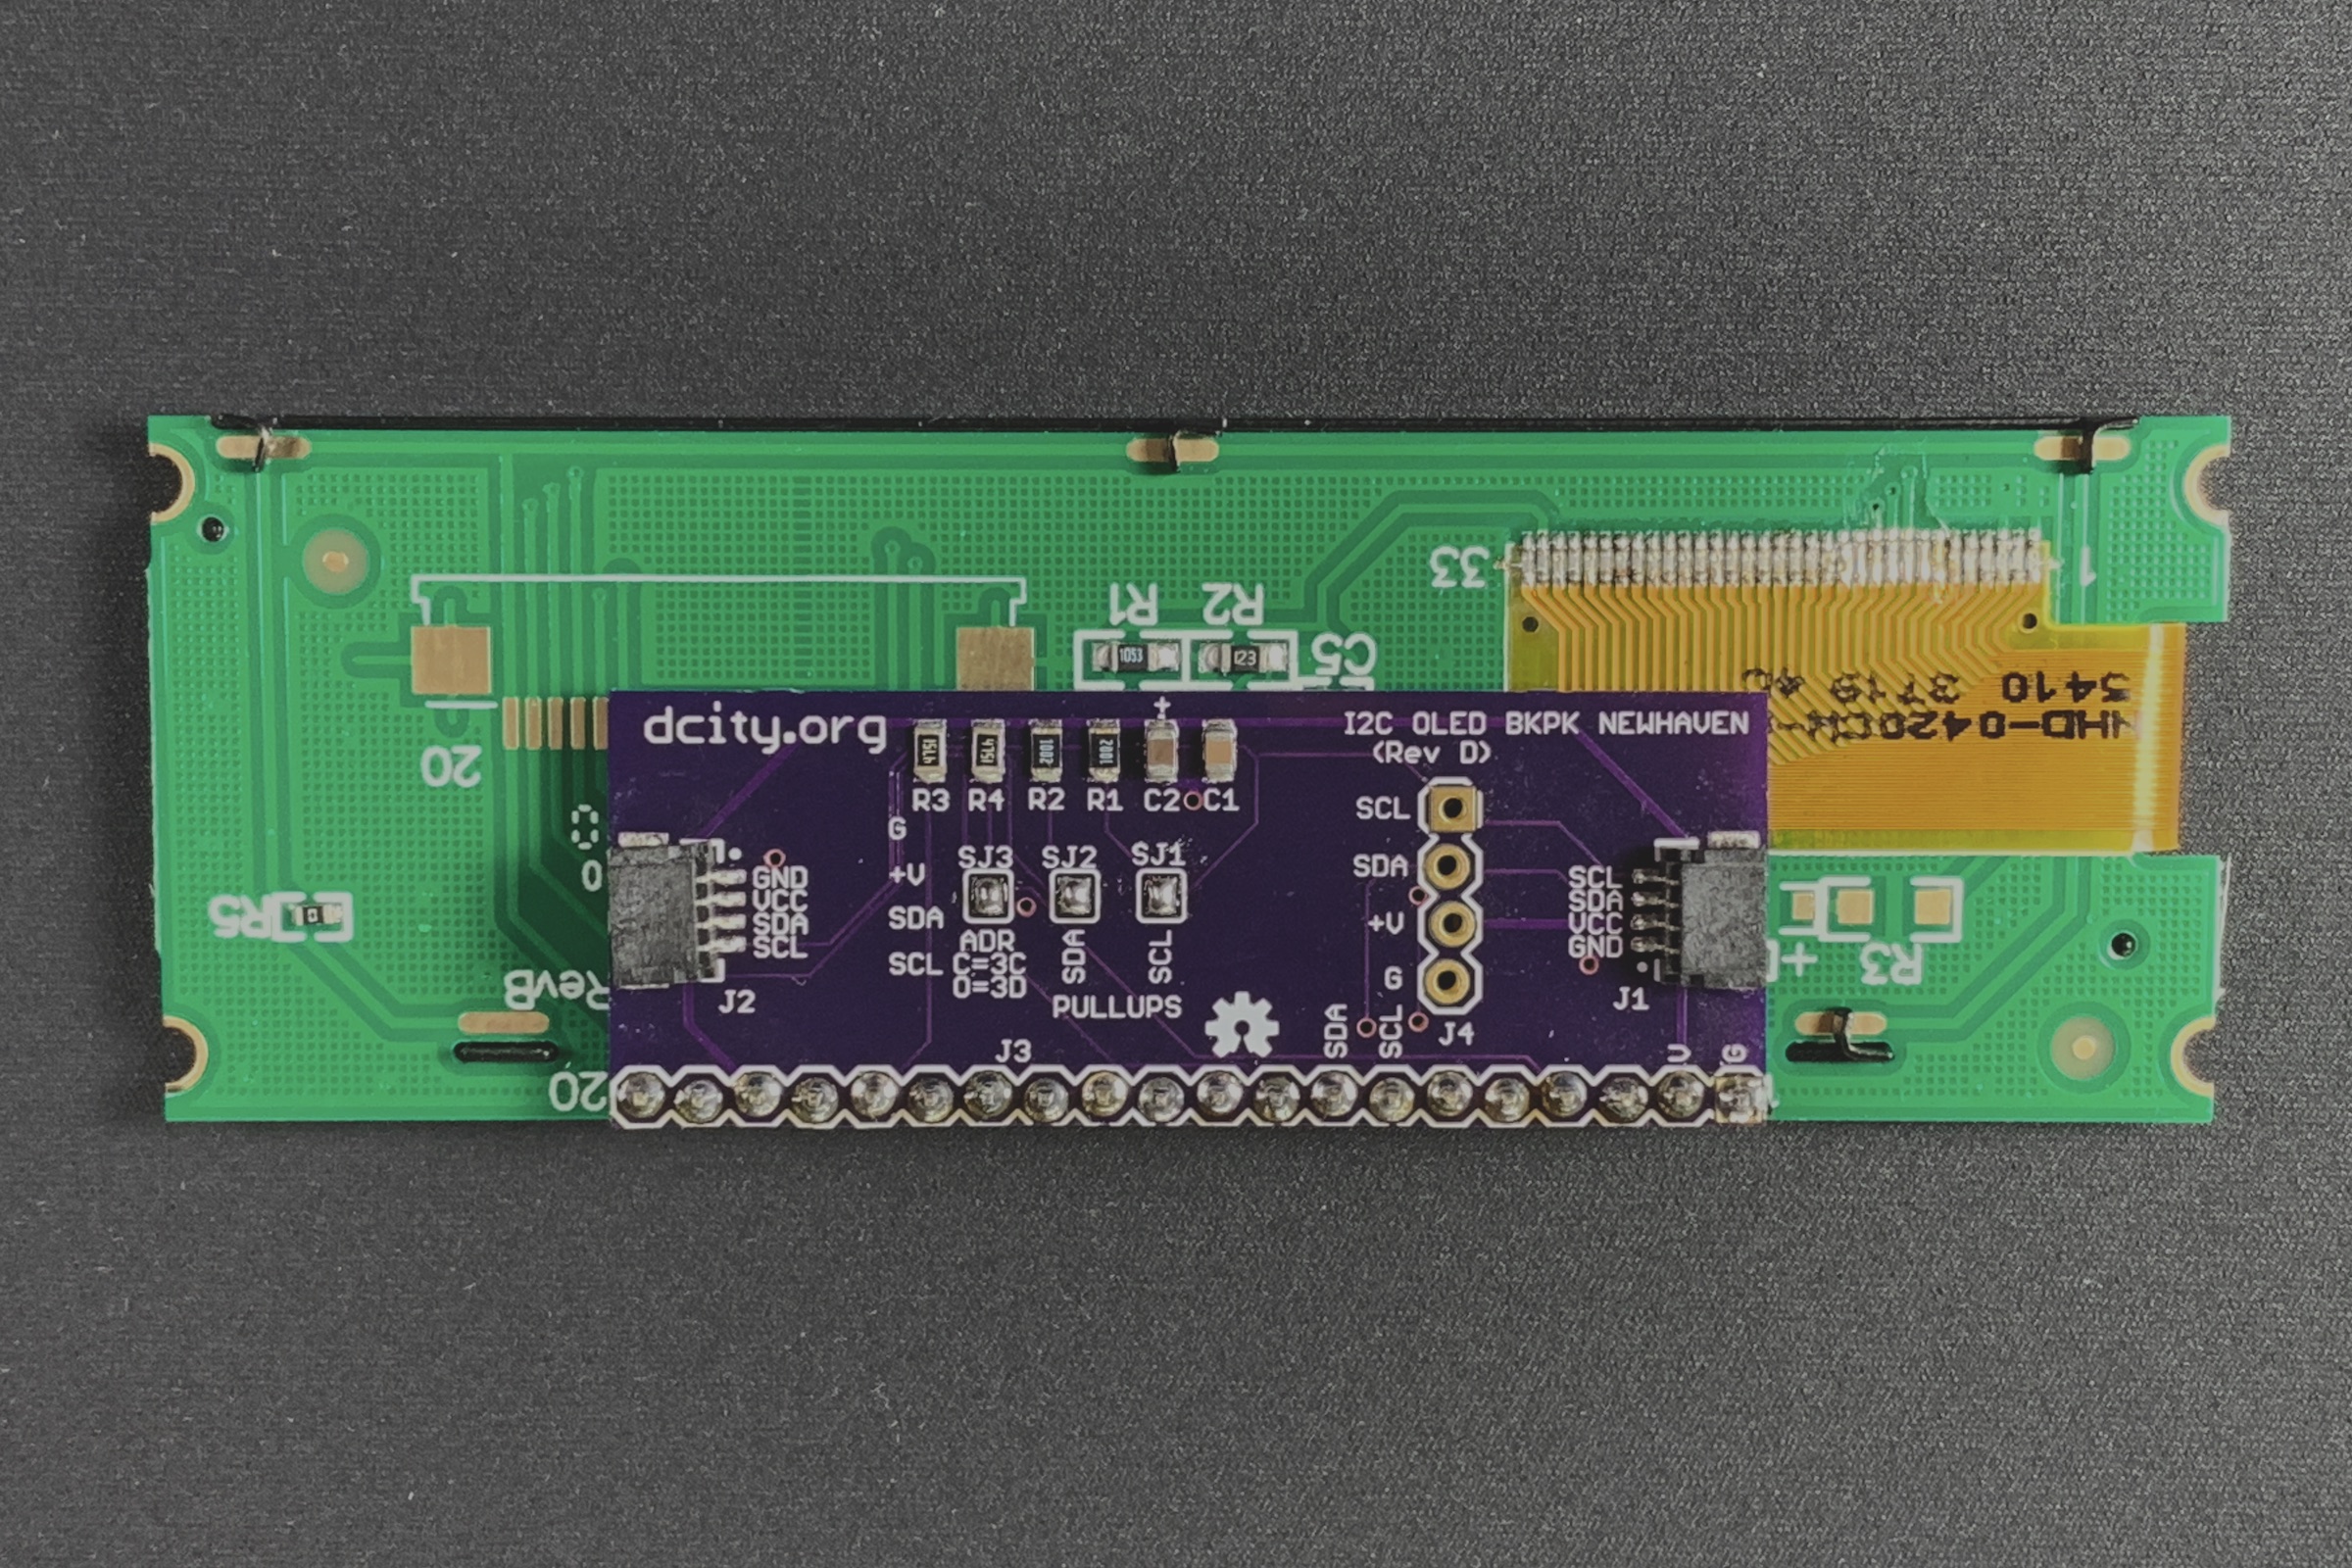
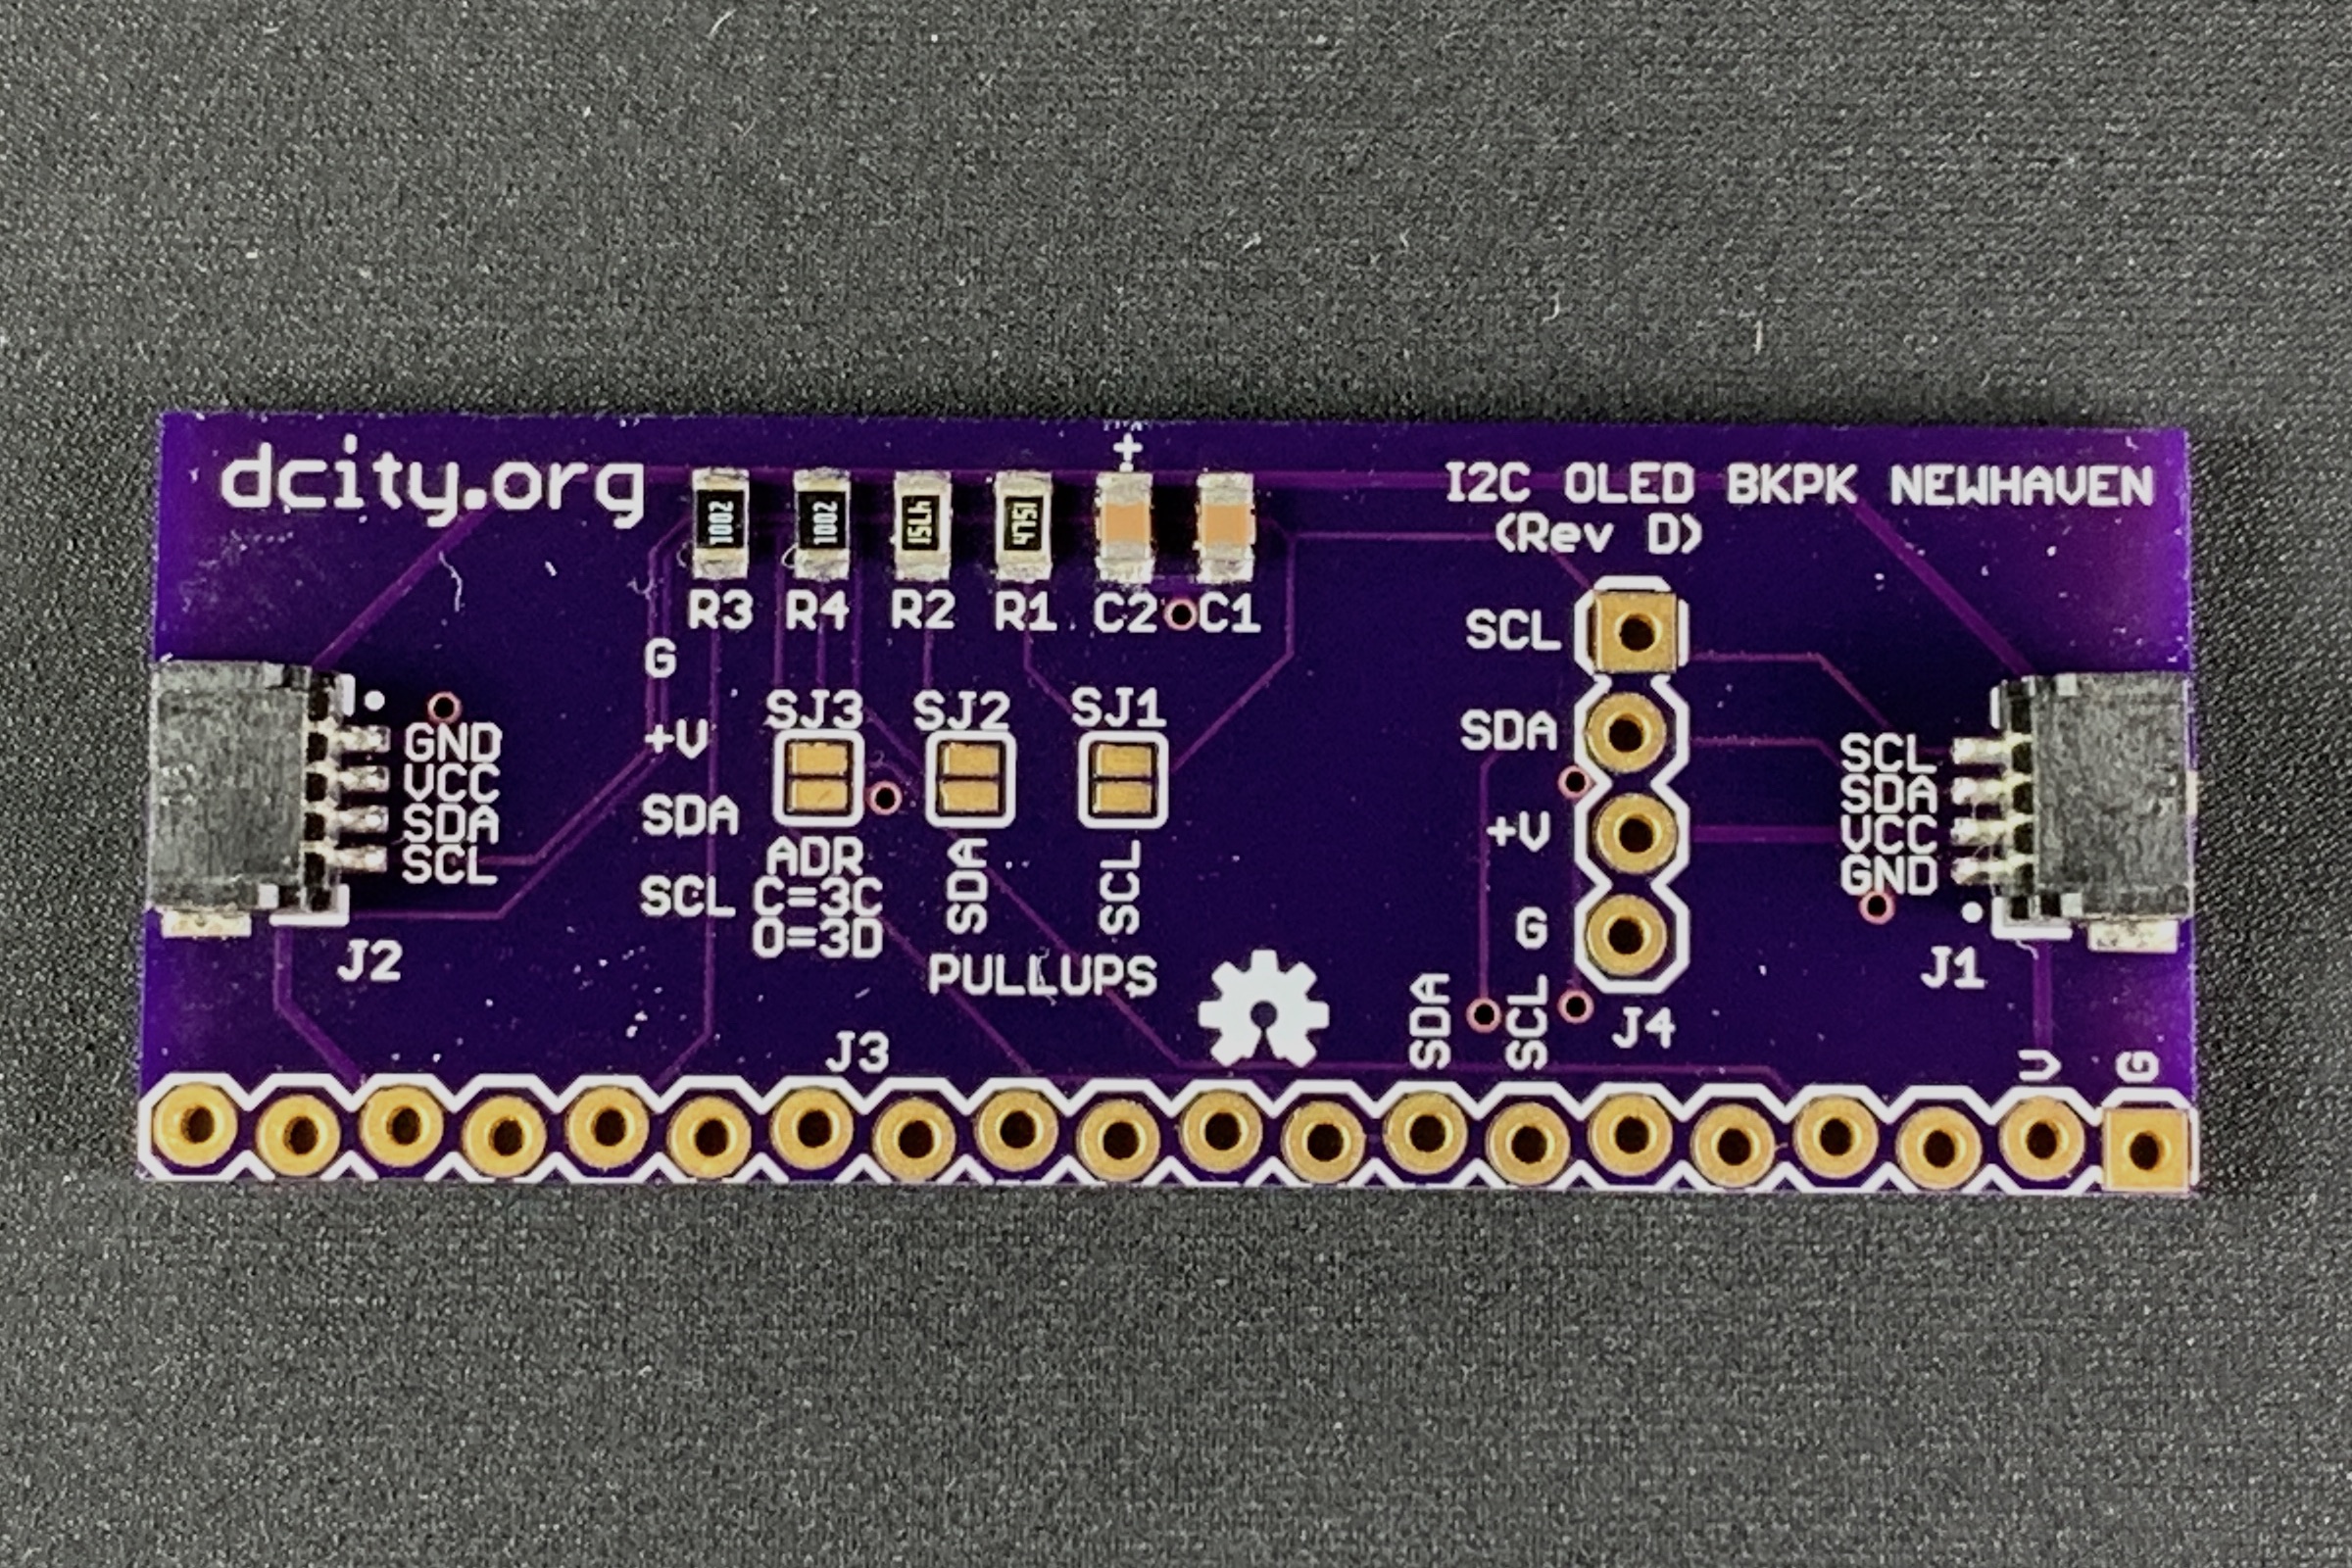
- your LCD character display has the commonly used HD44780 controller chip and has a I²C PCA8574 i/o expander chip on a backpack board (which gives the display I²C capability).
- your OLED display module has the commonly used US2066 controller chip (which has I²C built in).
The I²C communication standard only uses 2 pins on the microcontroller to communicate with many I²C devices. This makes it easy to connect many devices (sensors, displays, motors, etc.) to a microcontroller.
Some character displays have I²C built in, or a backpack board can be mounted on the back of the display board. For more hardware information see the following links.
Library Installation
Arduino IDE
Arduino provides several methods for installing libraries. The following is one of the easiest methods.
- Importing a .zip Library into the Arduino IDE:
- At the Github repository for the Arduino version of I2cCharDisplay library click on “Download ZIP” button above the list of files (you may need to be signed in to Github to see this button).
- This will download the library files to your computer.
- Then in your Arduino IDE, click on the menu item Sketch > Include Library > Add .ZIP Library.
- Navigate to zip file you downloaded and open it.
- Then click on Sketch > Include Library.
- Select I2cCharDisplay from the list, and the library files will be ready to use in your sketch.
- You will need to restart the Arduino IDE in order to use the library and see the I2cCharDisplayDemo.ino program listed.
- To run the demo program, click on the menu item File > Examples > I2cCharDisplay.
This Arduino library and demo program are located in our github repository.
Particle Web IDE
Using the Particle Web IDE
- To run the I2cCharDisplayDemo program:
- Click on the “library” icon on the far left side.
- Scroll to find the I2cCharDisplay Library, and click on it.
- Click on the file name “I2cCharDisplayDemo.ino” (near the bottom left)
- Click on the button “USE THIS EXAMPLE”. This will create a new app with the demo program and the library files, which you can examine, compile or flash to a device. (Note: If you get an error saying that it can’t find the “I2cCharDisplay.h” file, add a blank line anywhere in the demo program and recompile again).
- To add the I2cCharDisplay library to an existing app:
- Click on the “library” icon on the far left side.
- Scroll to find the I2cCharDisplay Library, and click on it.
- Click on “INCLUDE IN PROJECT”.
- Click on the app that you want to add the library to. Click on “CONFIRM”. An include statement will be added to the top of your app.
This I2cCharDisplay library and demo program are located in our github repository.
Raspberry Pi
- To download the Raspberry Pi I2cCharDisplay library module and demo program from GitHub, follow these steps:
- You will need the git application on your RPi (if you don’t have it already). In terminal type: sudo apt-get install git-core
- Next, change to the directory where you want in save the I2cCharDisplay library and demo program. For example, to change to your Documents folder, type: cd /home/pi/Documents
- Then download and save the library by typing: git clone https://github.com/dcityorg/i2c-char-display-raspberrypi.git
- Change directory to the one just created: cd i2c-char-display-raspberrypi
- This directory should now contain the library module and demo program for the I2c Char Display (written in Python)
- To run the demo program, type: python3 I2cCharDisplayDemo.py
- To install just the I2cCharDisplay.py library module onto your RPi where other python library modules are saved, follow these steps:
- You will need the git application on your RPi (if you don’t have it already). In terminal type: sudo apt-get install git-core
- The following will run the setup script from our github repository and install just the I2cCharDisplay.py library module on your RPi.
- In terminal type: pip3 install git+https://github.com/dcityorg/i2c-char-display-library-raspberrypi.git
- Put the following at the top of your python program to use this library module: from I2cCharDisplay import I2cCharDisplay
- Installing the library module this way allows you to use it from any directory, without having to put the library module in the same directory as your own python program.
This Raspberry Pi library and demo program are located in our github repository.
Functions in the I2cCharDisplay Library
- clear() – clear the display and home the cursor to 1,1
- home() – move the cursor to home position (1,1)
- cursorMove(row,col) – move cursor to position row,col (positions start at 1,1)
- displayOff() – turns off the entire display
- displayOn() – turns on the entire display
- cursorBlinkOff() – turns off the blinking block cursor
- cursorBlinkOn() – turns on the blinking block cursor
- cursorOff() – turns off the underline cursor
- cursorOn() – turns on an underline cursor
- displayShiftLeft() – shifts all rows of the display one character to the left (shifts cursor too)
- displayShiftRight() – shifts all rows of the display one character to the right (shifts cursor too)
- cursorShiftLeft() – shifts the cursor one character to the left
- cursorShiftRight() – shifts the cursor one character to the right
- displayLeftToRight() – characters are displayed left to right (DEFAULT MODE)
- displayRightToLeft() – characters are displayed left to right
- displayShiftOn() – mode where cursor is held constant and previous characters are shifted
- displayShiftOff() – mode where cursor moves after each character is received
- createCharacter(address, characterMap[]) – used to create custom dot matrix characters (8 are available)
- backlightOn() – turn backlight on (LCD displays only)
- backlightOff() – turn backlight off (LCD displays only)
- setBrightness(value) – set display brightness (OLED displays only)
- fadeOnce(fade time 0-15) – (OLED displays only) fades the brightness down to about half brightness at a rate set by the fade time value. Then the display turns off, and stays off until you do a fadeOff() function. On some display types, this doesn’t work very well. It takes the display only to half brightness and then turns off the display). In my opinion this feature is not that useful, but I provided it because it is built into the OLED.
- fadeBlink(fade time 0-15) – (OLED displays only) fades the brightness down to about half brightness at a rate set by the fade time value. Then the display turns off briefly and then increases in brightness until it reaches maximum brightness. The cycle then repeats. On some display types, this doesn’t work very well. It takes the display only to half brightness and then blinks the display and then increases the brightness. In my opinion this feature is not that useful, but I provided it because it is build into the OLED.
- fadeOff() – (OLED displays only) turns off the fade feature of the OLED
-
write(char) – allows the Print command to work to print to the display (only in Arduino and Particle library)
- write(char) – writes one ascii character to the display (only in Raspberry Pi library)
- writeString(string) – writes a string to the display (only in Raspberry Pi library)
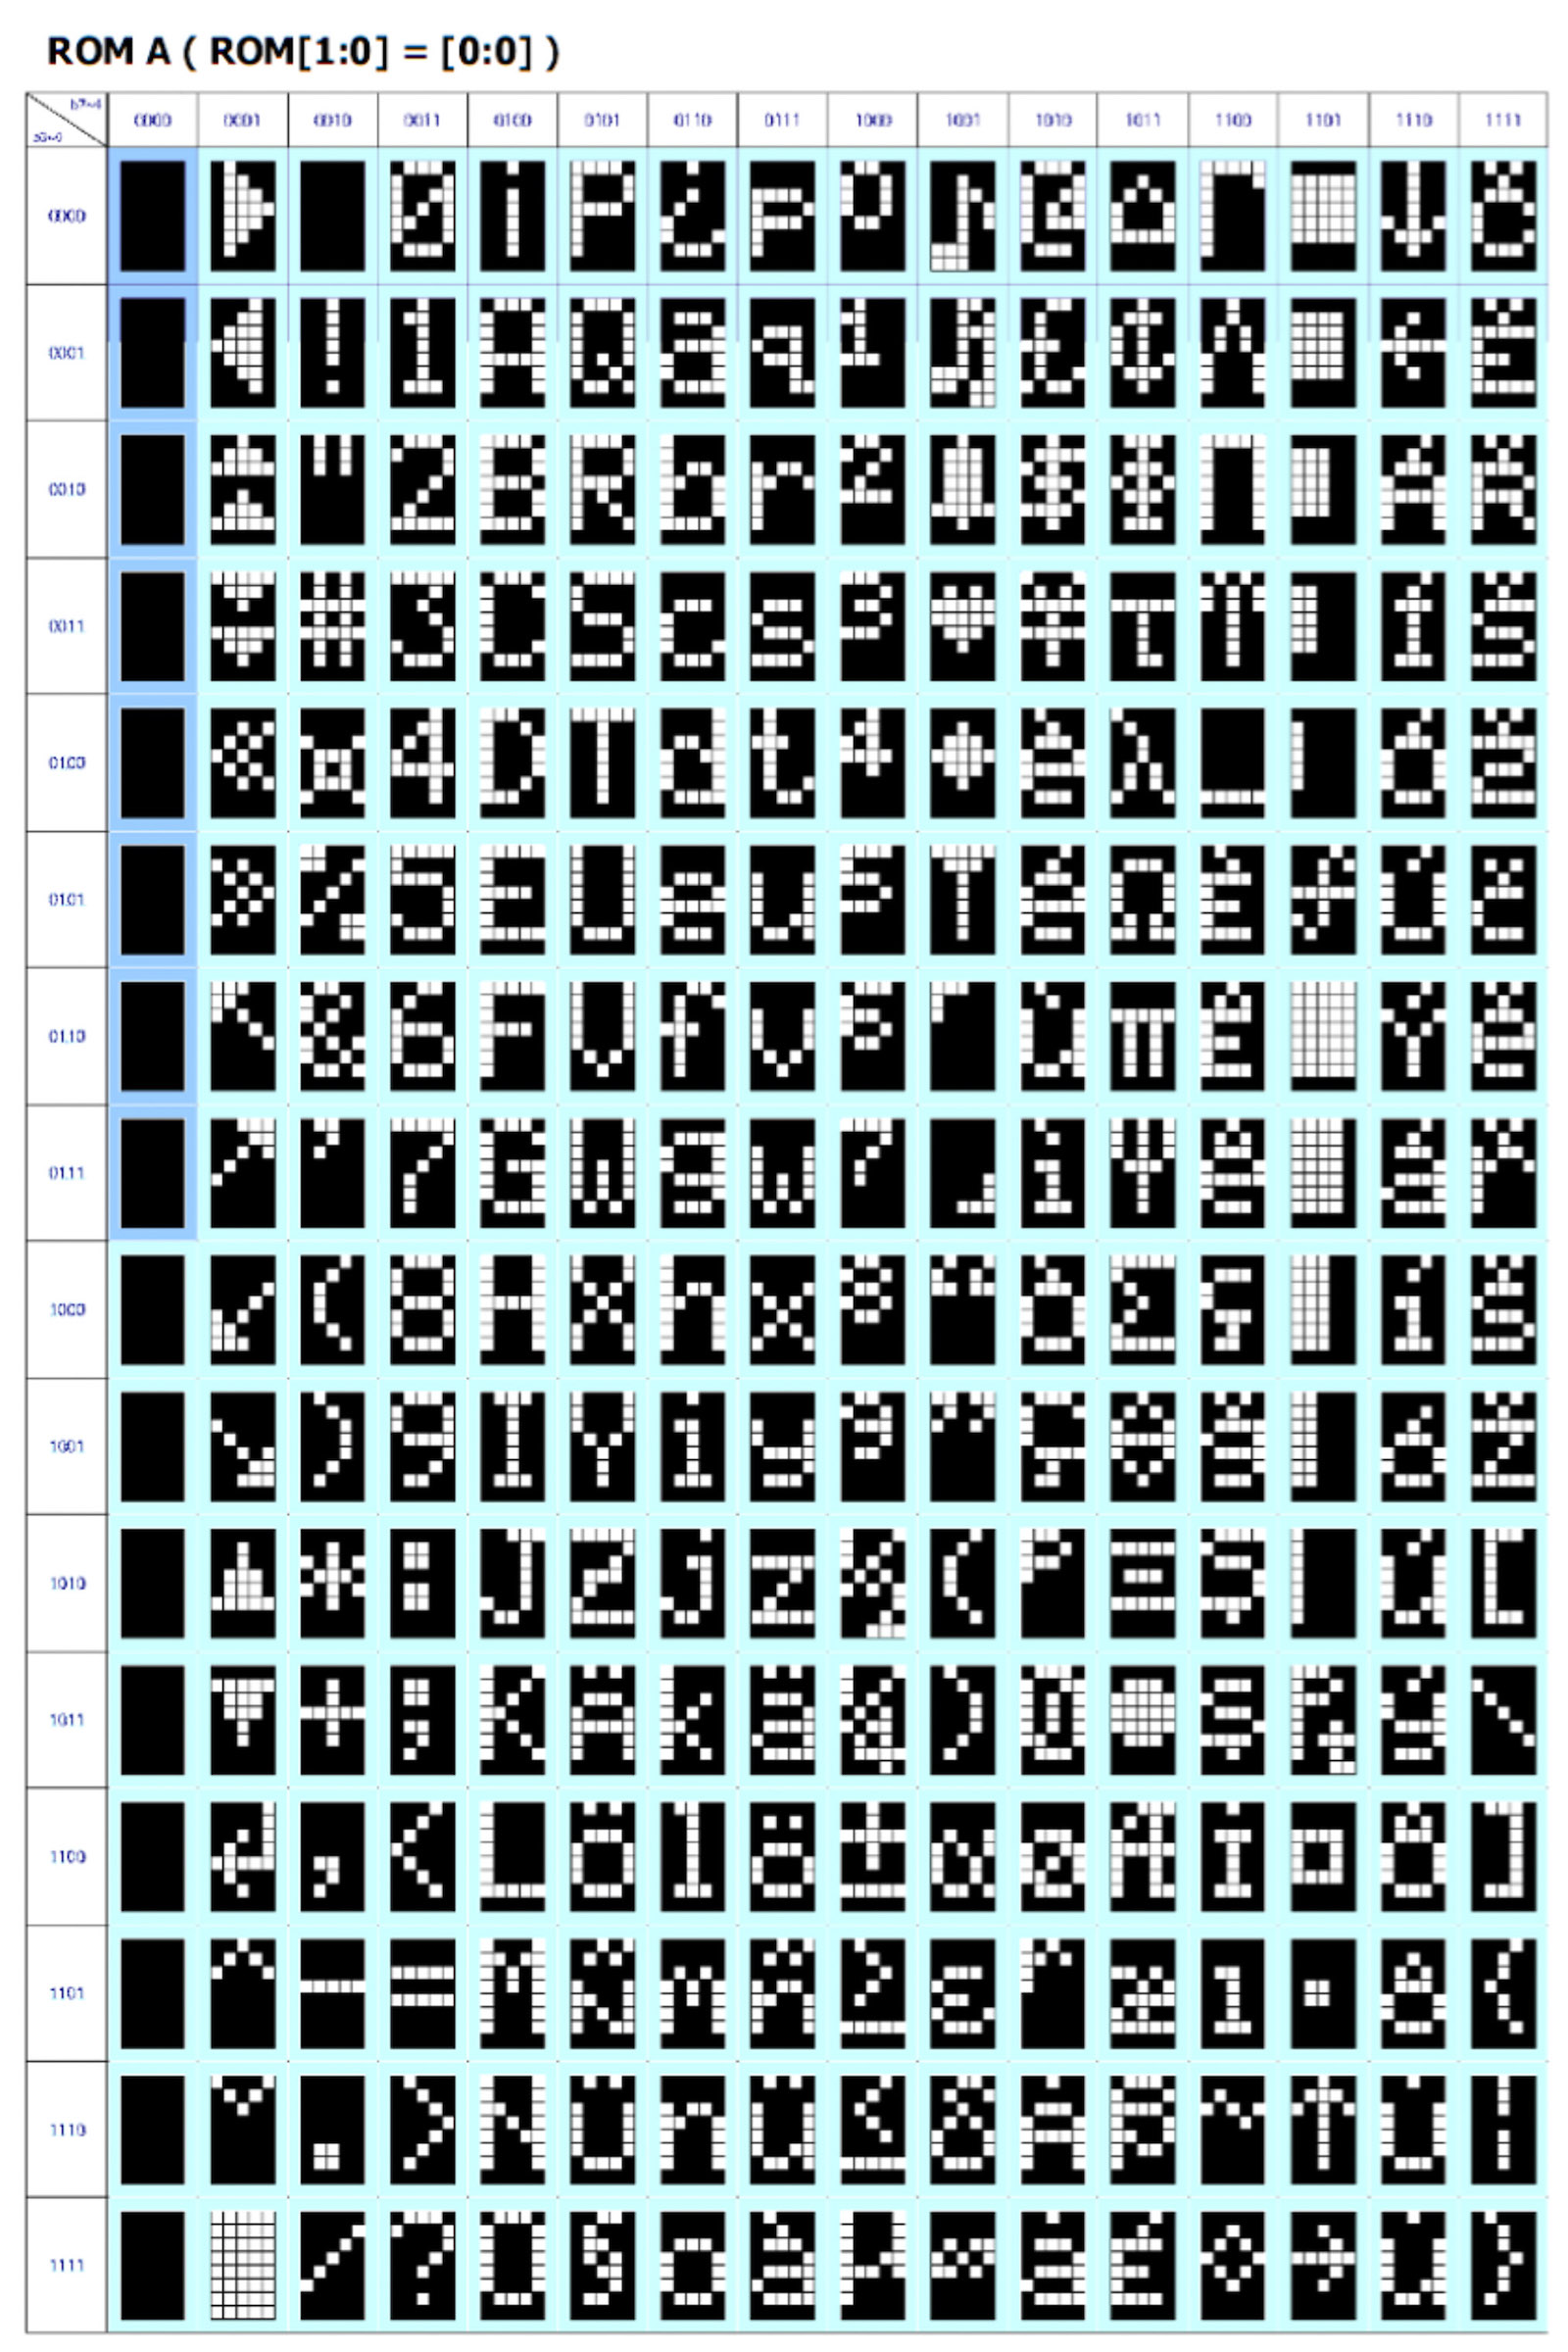
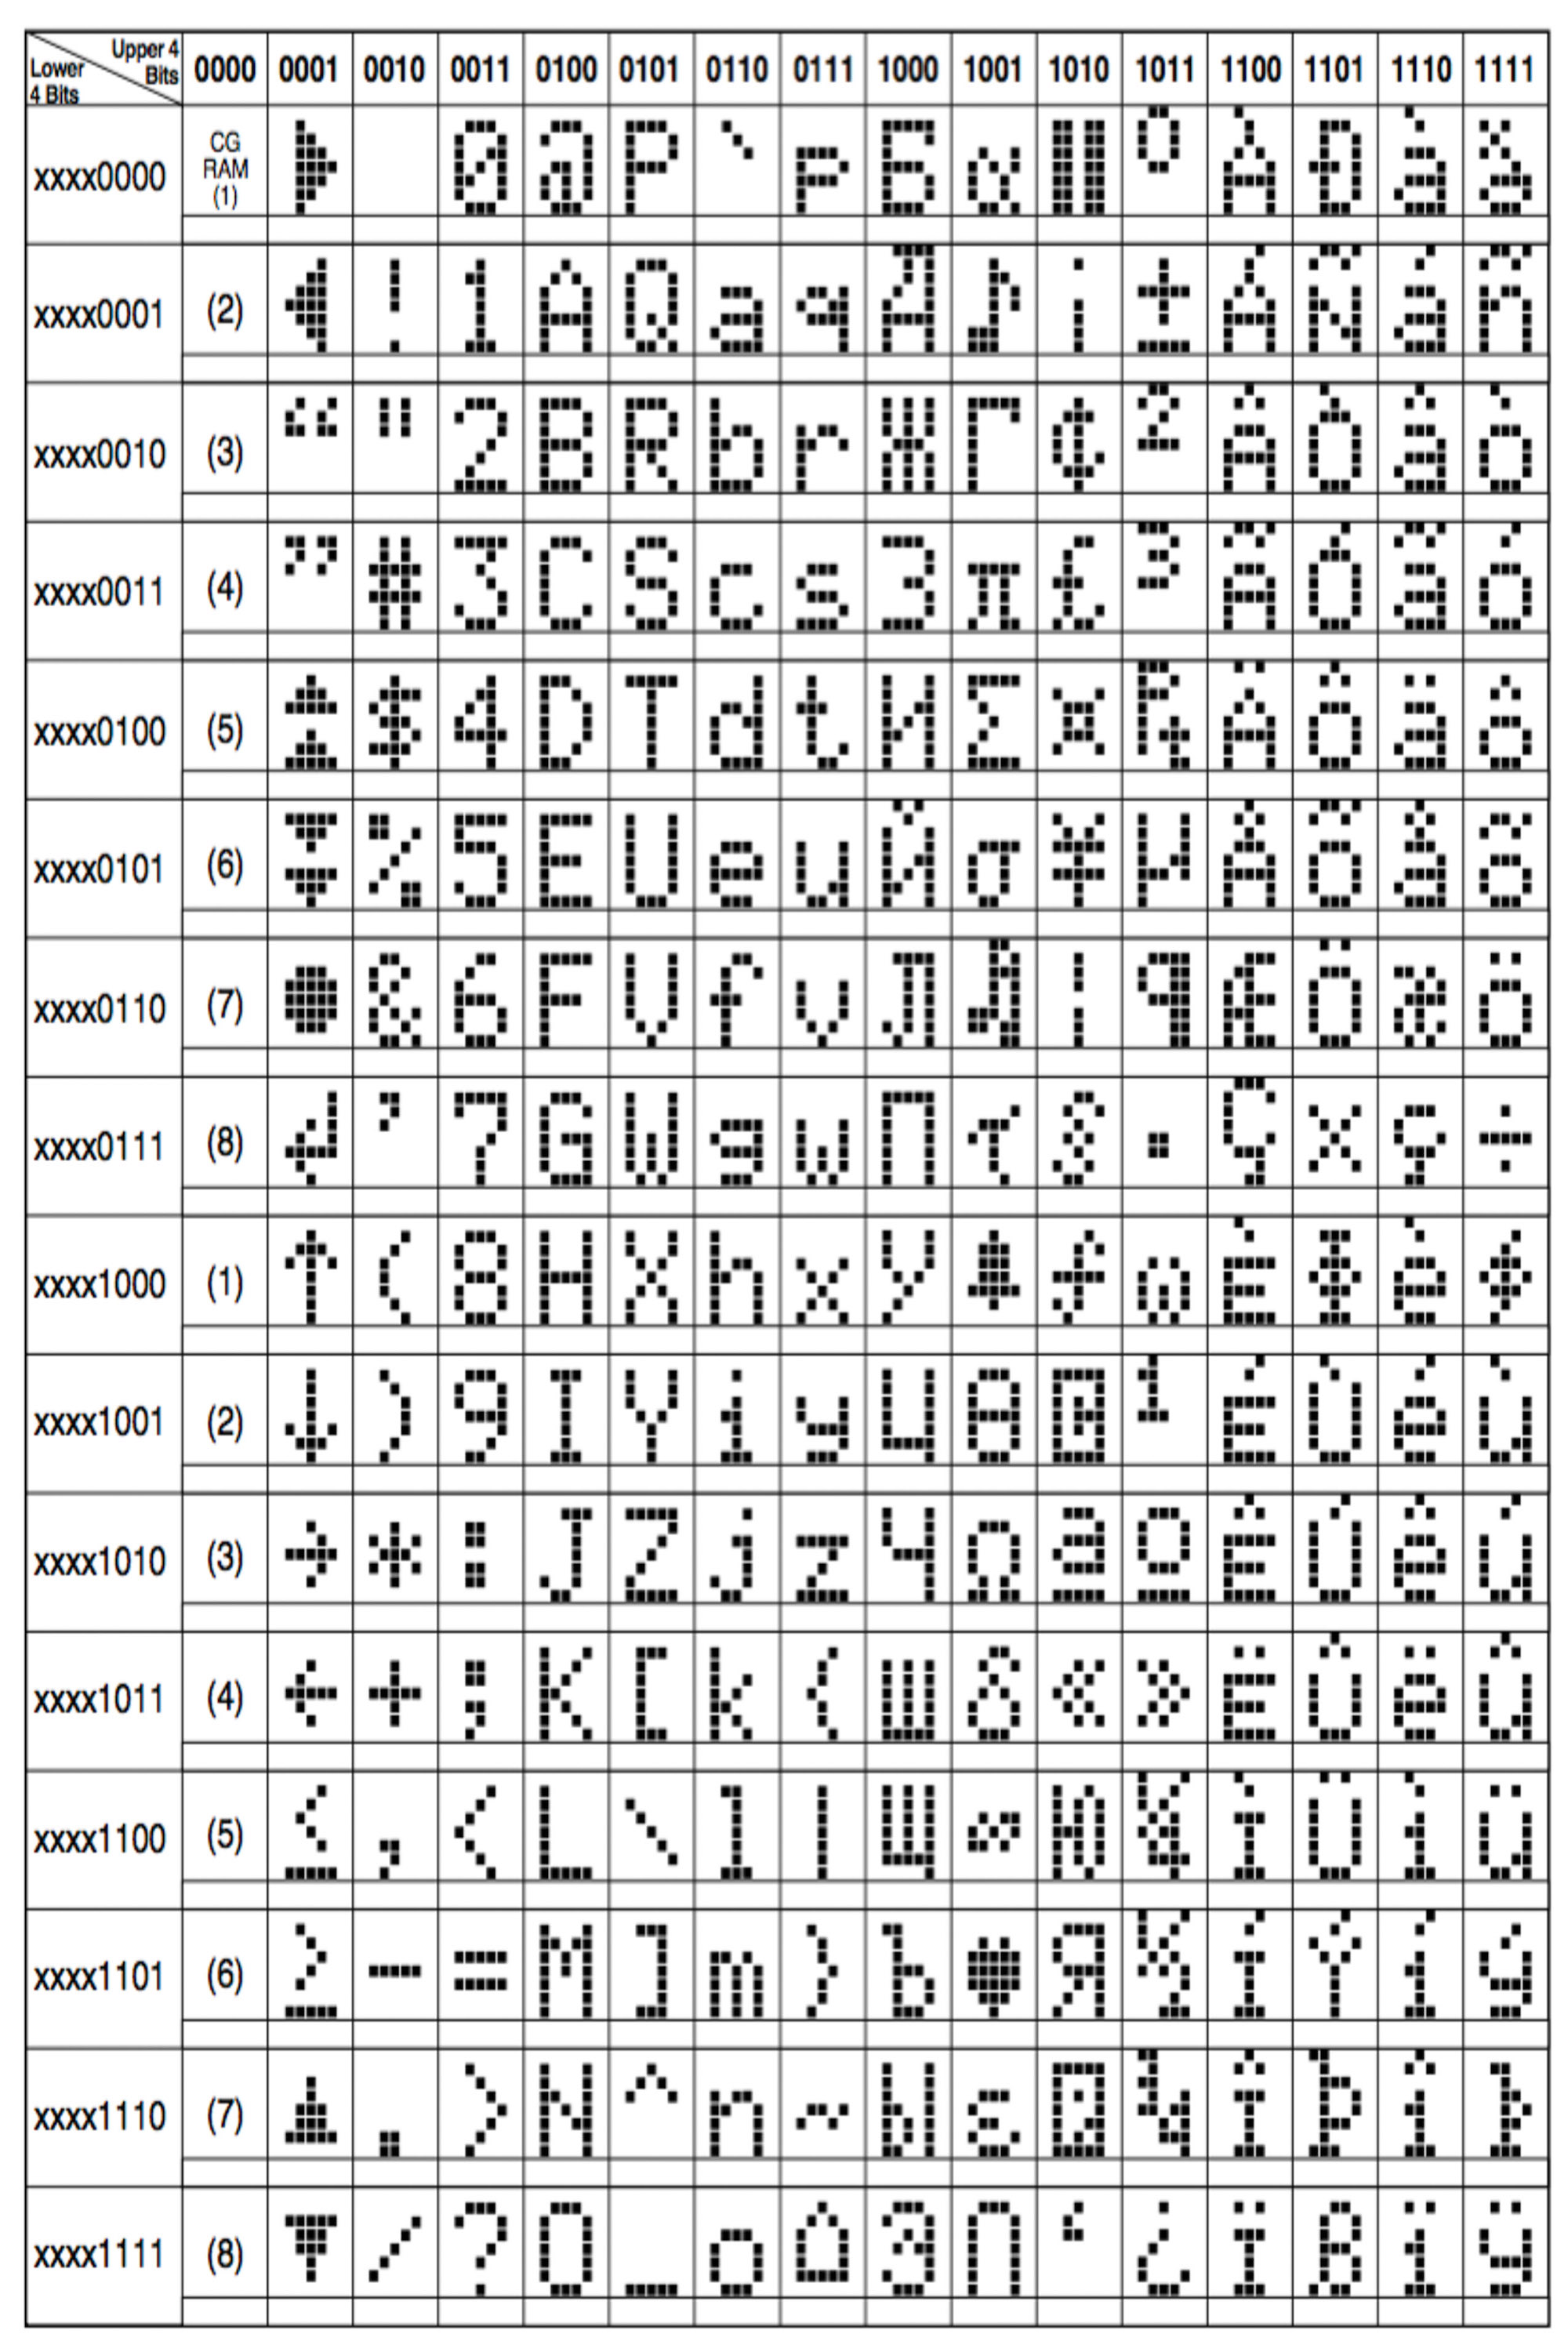
Character Sets
License Information
Our License Information is here.
Leave a Reply