
Description
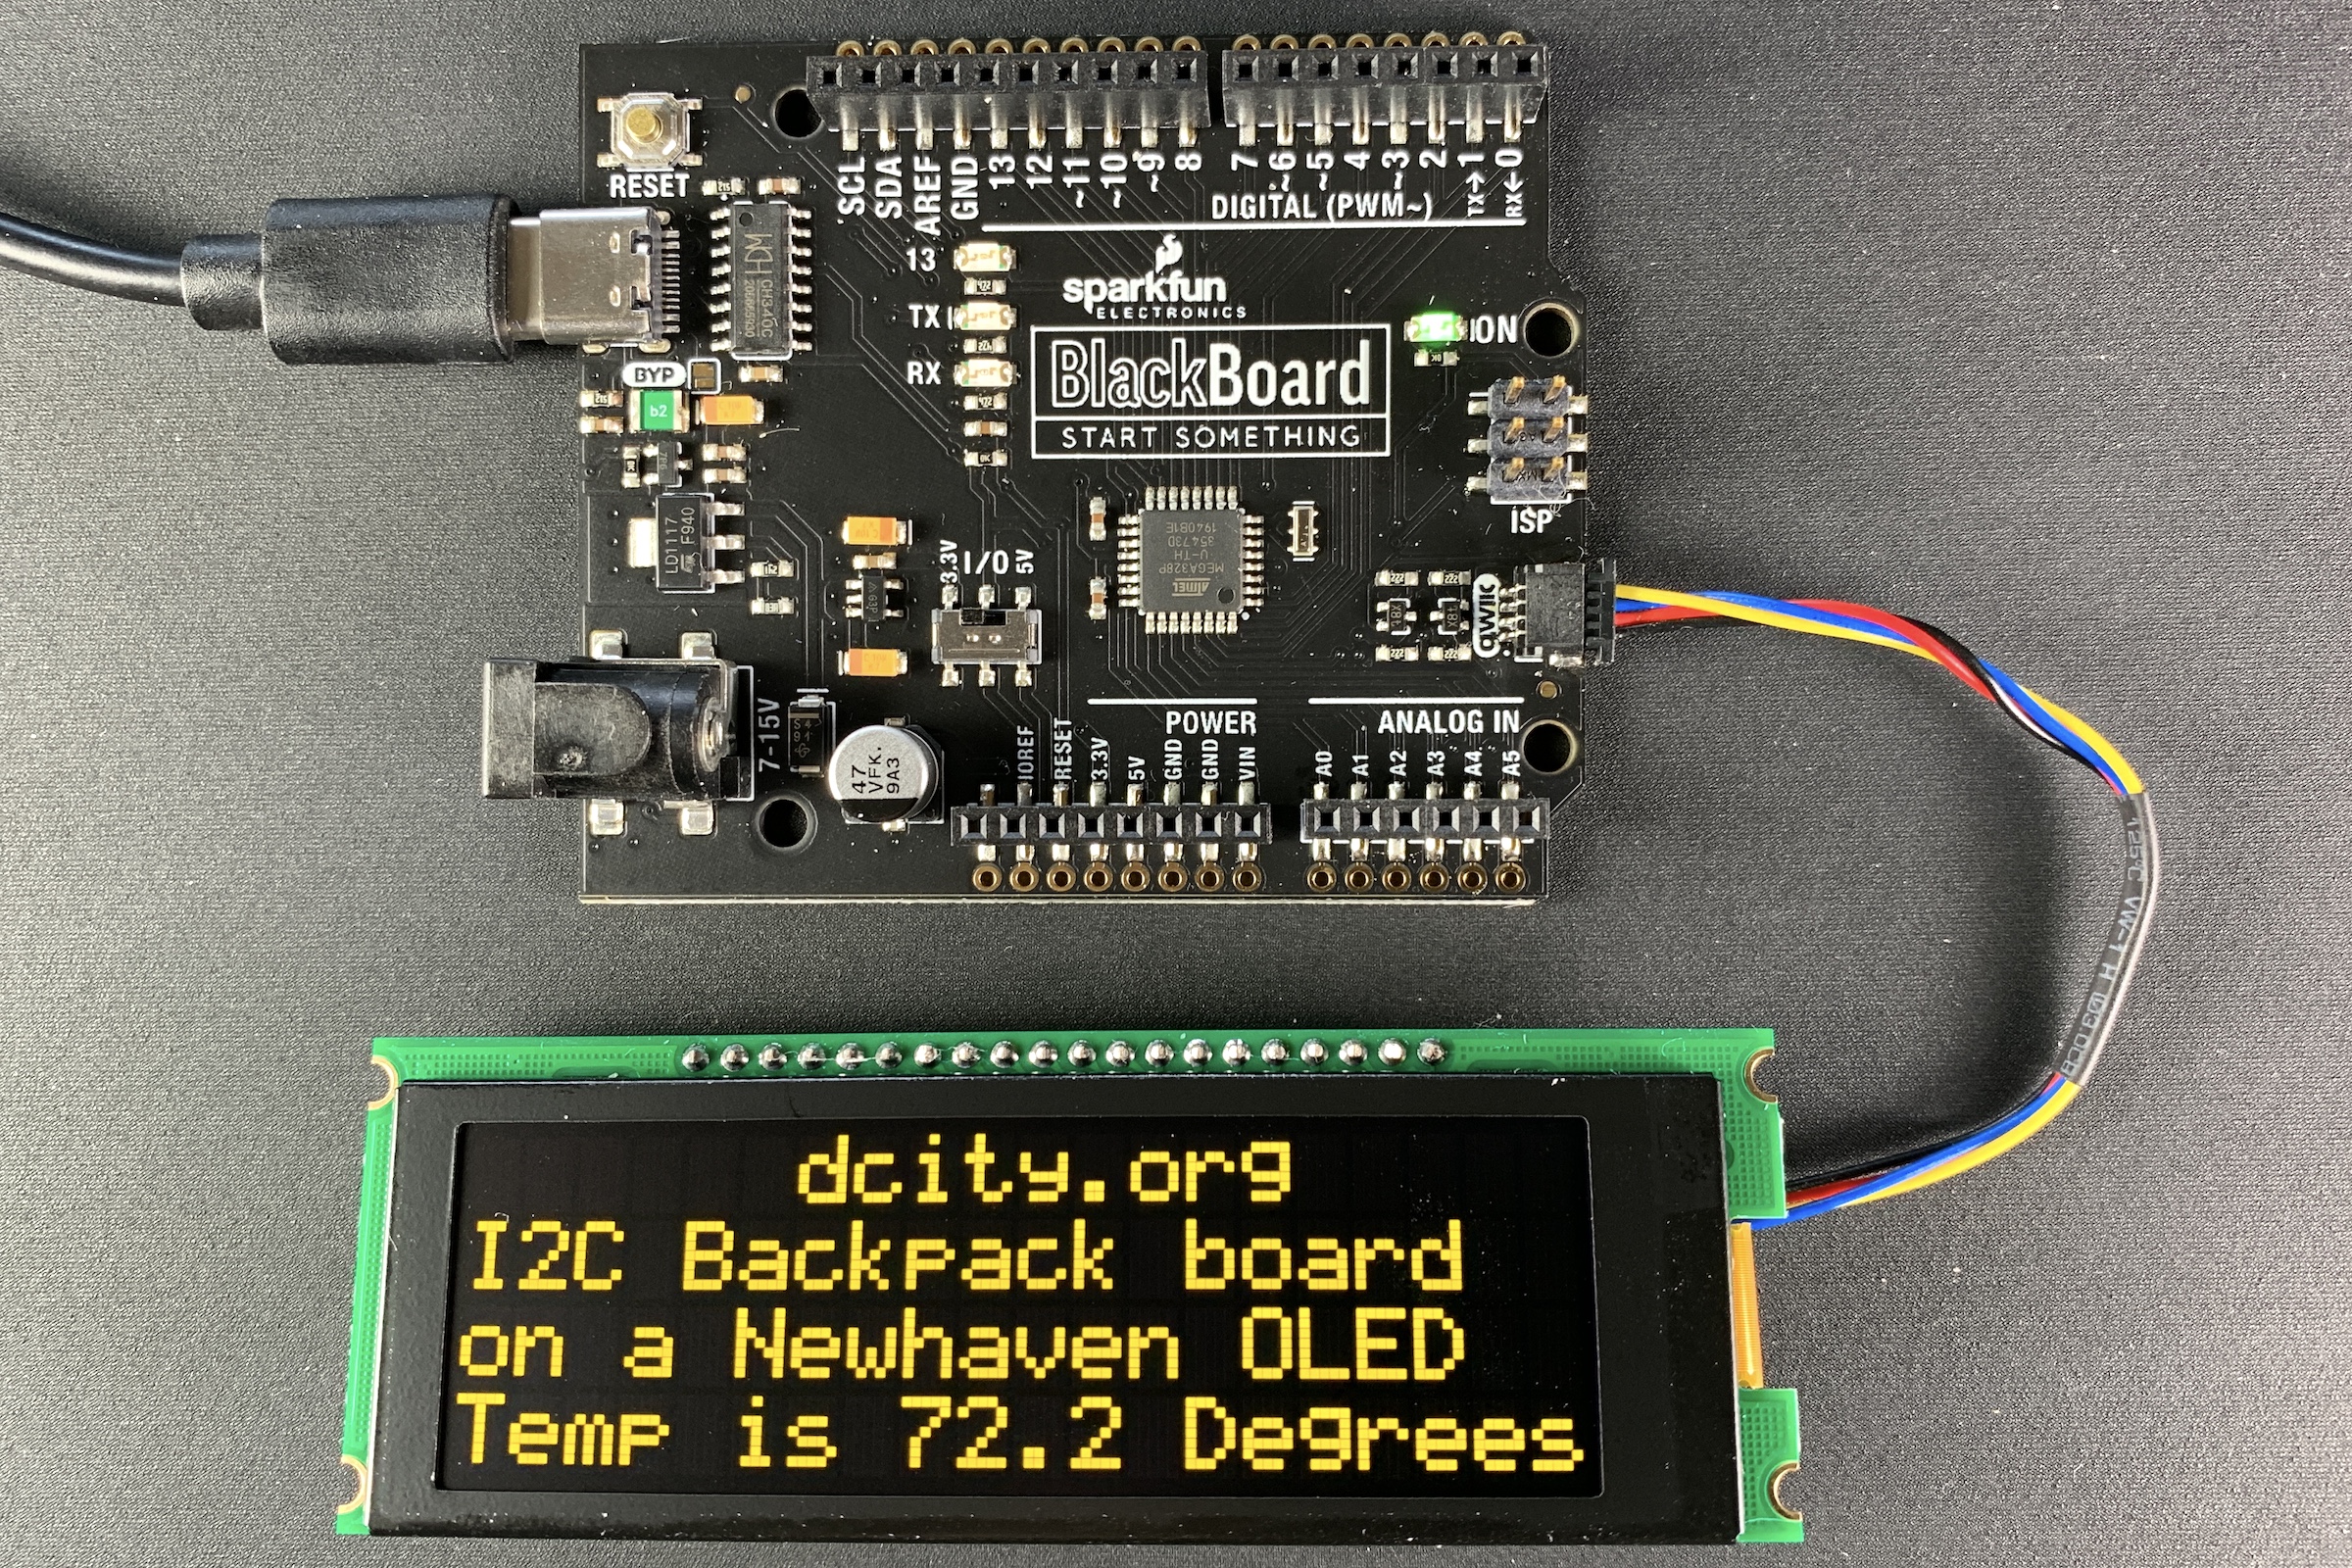
This project is a backpack board that sits on the back of Newhaven OLED character displays (16×2, 20×2, and 20×4), and it interfaces the display to the I²C bus for easy connection to many microcontrollers using Qwiic connectors. A software library is available that works with Arduino, Particle and Raspberry Pi boards.
OLEDs are my favorites types of displays because they are bright, easy to read in moderate sunlight, and relatively low in power consumption. Newhaven makes a wide variety of OLED character displays. They offer 16×2, 20×2, and 20×4 (columns by rows) sizes and they come in many colors (blue, green, yellow, and red). They operate on 3.3 or 5 volts, so they are ideal for a most embedded projects. I like the 4 line by 20 column Newhaven NHD-0420CW-AY3 display. This display has bright yellow pixels and has a lifetime of over 150,000 hours. You’ll need to choose a Newhaven OLED module that uses the US2066 controller chip which has I²C built in (see links below).
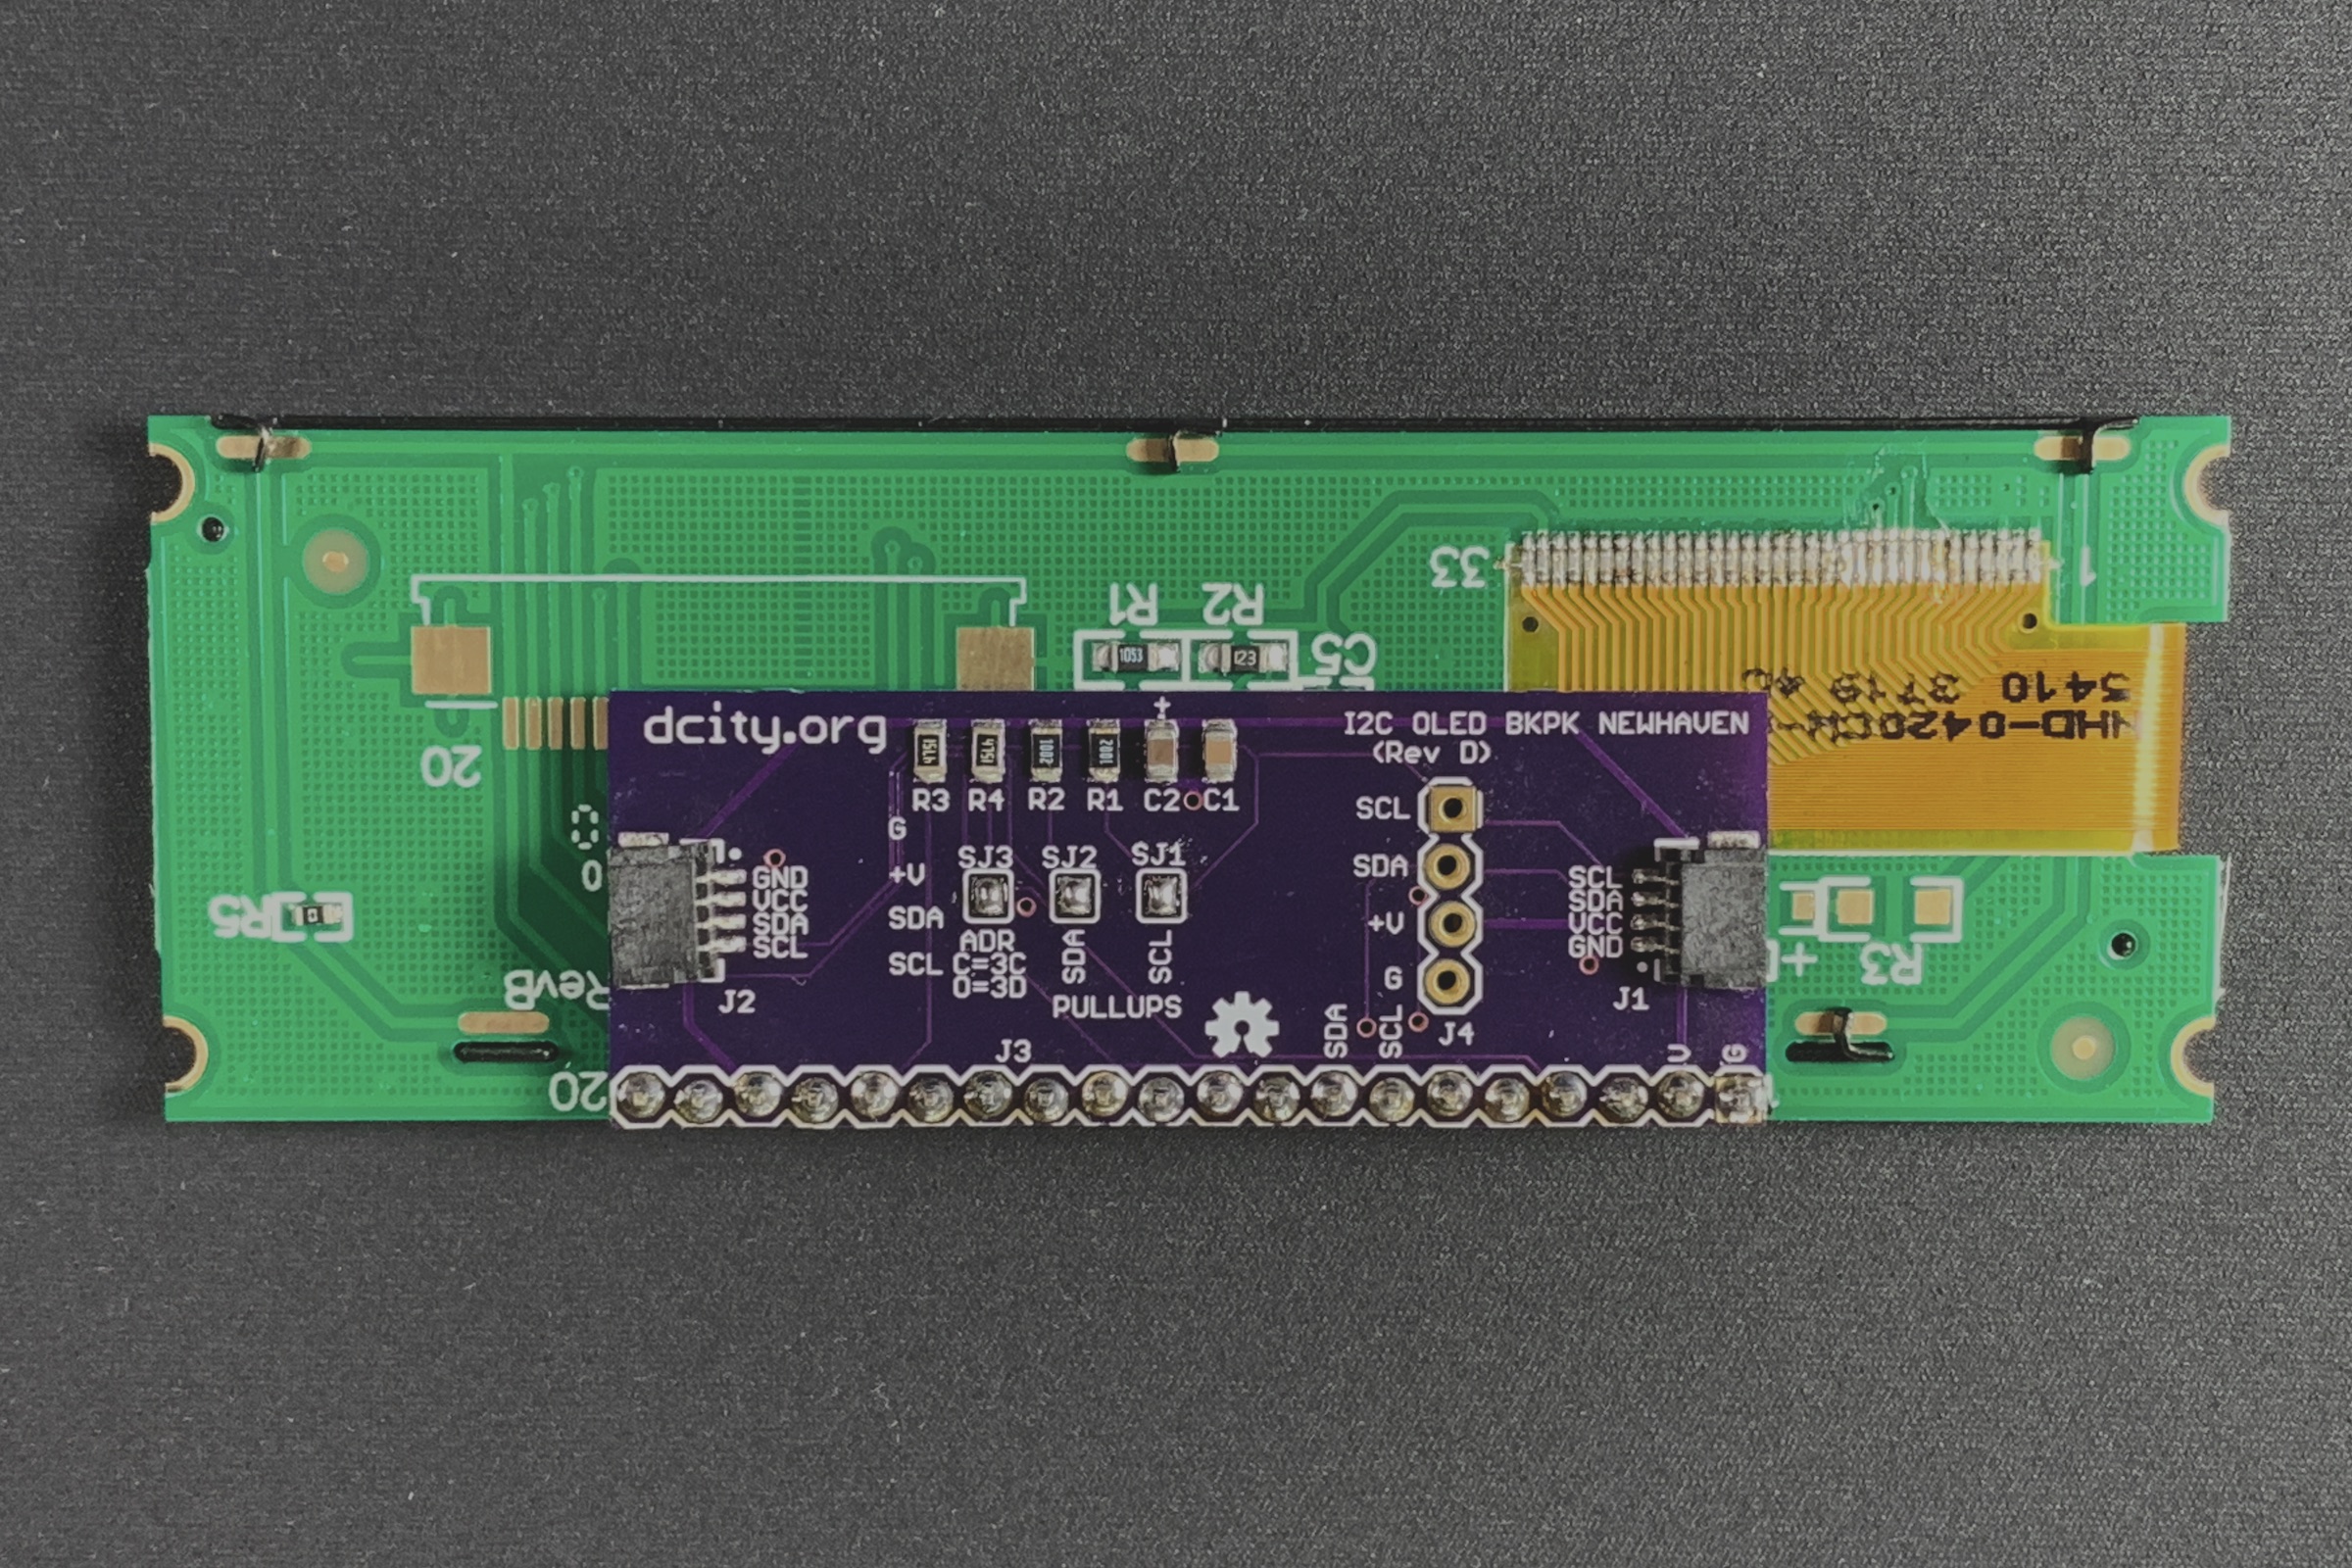
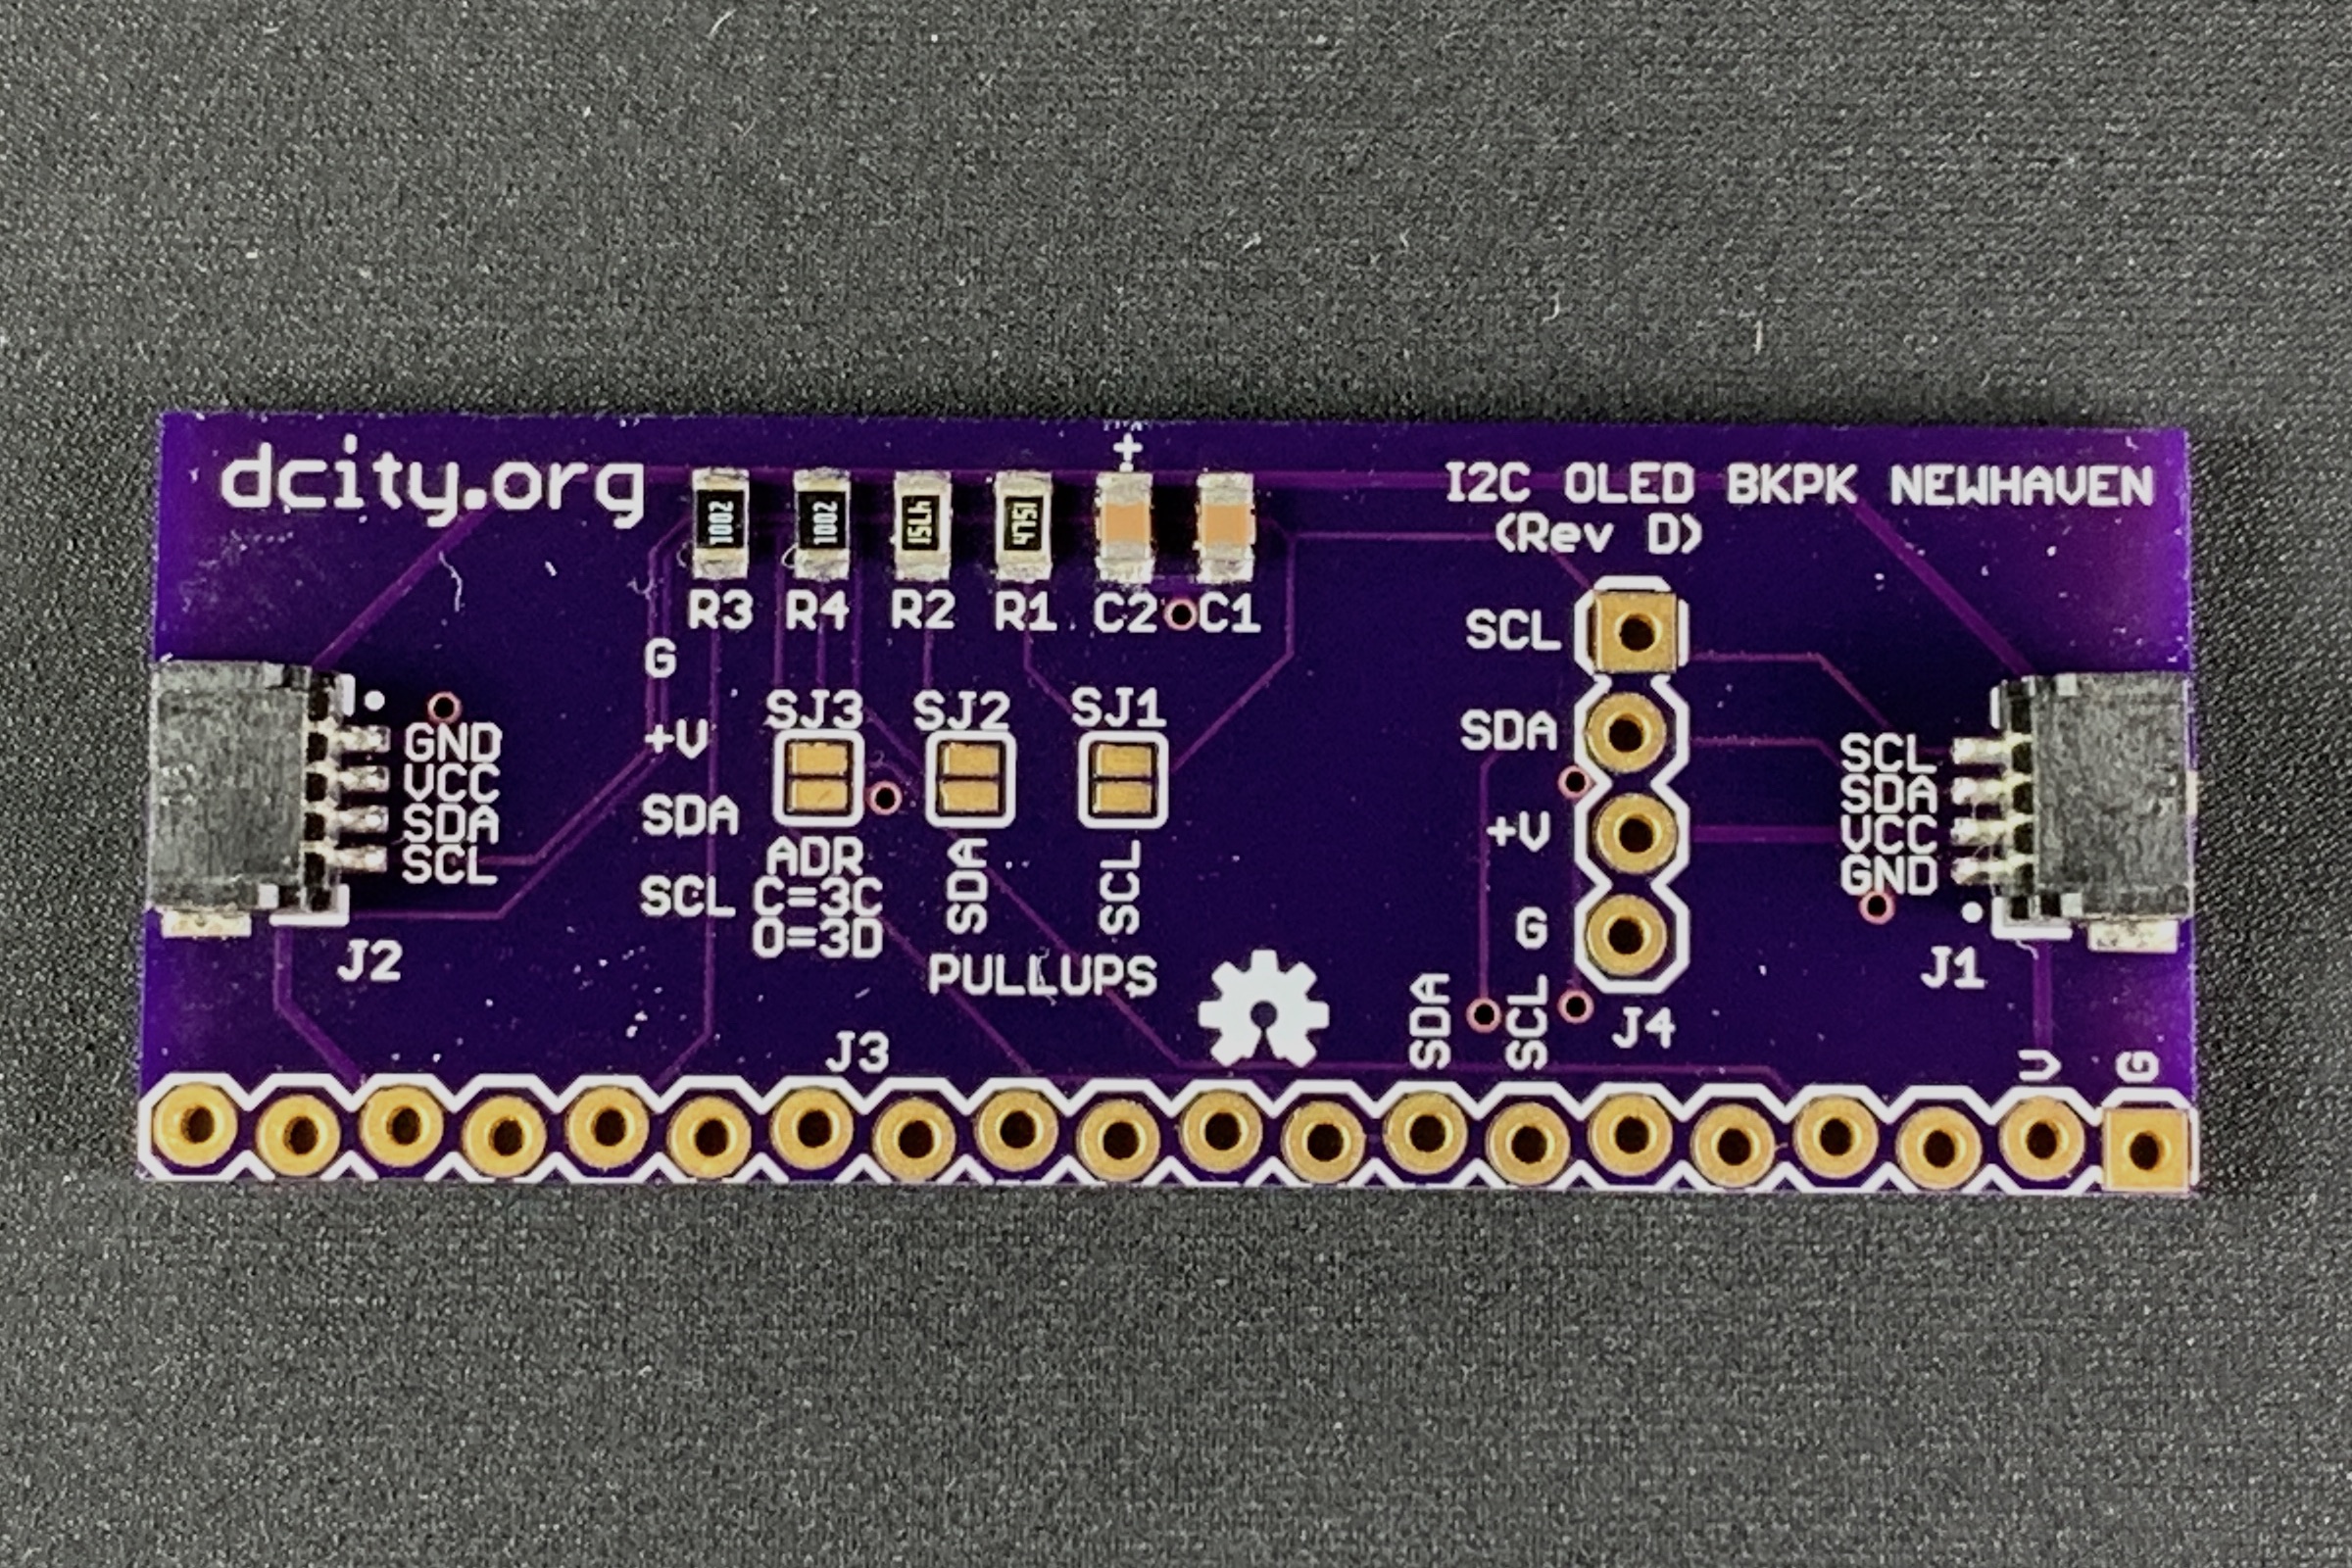
Since these OLED modules have I²C built into the controller chip, you don’t necessarily need a backback board to interface to it. But the backpack board makes it easier to use, as it has Qwiic connectors on it, as well as the I²C pull up resistors and jumpers for setting the I²C address.
This project consists of a board that sits on the back of the display, and provides two Qwiic type I²C connectors (and also one 4 pin connector with .1 inch spacing, if you prefer). This board also has the I²C pullup resistors (enabled with solder jumpers), a jumper to select the I²C address. The display and backpack board will operate on 3.3 or 5 volts, which allows it to work with the most microcontrollers.
You can purchase the Newhaven OLEDs direct from Digikey, Mouser and other Newhaven distributors.
I²C Oled Backpack “bare” boards are available from OSH Park.
To make it easy to use this display, I wrote software libraries for the Arduino, Particle and Raspberry Pi. In these libraries there are over 20 functions, such as clear(), moveCursor(), createChar() (for making custom characters), and write() (for using the Print function).
Files
The schematic and pcb layout files (Eagle and pdf) are available at this Github repository.
Parts
This project does not require many parts, and most are available from Mouser. Bare PC Boards are available from OSH Park.
| Qty | Part | Value | Package | Vendor | Part Number |
|---|---|---|---|---|---|
| 1 | C1 | .1uF | 0805 | Mouser.com | 80-C0805C104M5R |
| 1 | C2 | 10uF | 0805 | Mouser.com | 647-F921A106MPA |
| 2 | J1,J2 | 4 pin | smd Qwiic connector | mouser.com | 485-4208 |
| 1 | J3 | 20 pins | .1 Header Pins | Mouser.com | 855-M20-9992045 |
| 1 | J4 | 4 pins | .1 Header Pins | Mouser.com | 855-M20-9990445 |
| 2 | R1,R2 | 4.75K | 0805 | Mouser.com | 71-CRCW0805-4.75K-E3 |
| 2 | R3,R4 | 10K | 0805 | Mouser.com | 71-CRCW0805-10K-E3 |
| 1 | PC Board | OSH Park | Order Link |
J4 does not need to be populated if you are using the Qwiic type connector to connect to the microcontroller. J4 can be used for other type connectors that use the standard .1 inch spacing.
You can purchase the Newhaven OLEDs direct from Digikey, Mouser and other Newhaven distributors.
I²C Oled Backpack “bare” boards are available from OSH Park.
Assembly
As you probably noticed, this board uses surface mount components, so you will need some skill in dealing with these small parts. Sparkfun has an excellent series of tutorials if you want to brush up your knowledge on soldering these small parts..
Hookup
Solder the backpack board to the OLED display module using a 20 pin strip header (.1 inch pin spacing).
Using a 4 pin Qwiic type cable, attach the backpack board to a microcontroller that has a I²C Qwiic type connector on it. This will power the display and connect the SDA and SCL lines to the microcontroller.
Jumpers
There are four solder jumpers near the center of the backpack board. To “close” a jumper, carefully solder a bridge across the two pads using a small amount of solder.
If you solder across SJ1 and SJ2 you can enable pull up resistors on the signals SCL and SDA (respectively). At least one pull up resistor is required on these lines somewhere on your various hardware boards.
SJ3 is used to set the I²C address of the board.
- If SJ3 is closed (shorted) the I²C address is 3C hex.
- If SJ3 is open (unshorted) the I²C address is 3D hex.
Software
For Arduino, Particle and Raspberry Pi users, the I2cCharDisplay library provides functions the take advantage of the features of this display. An included demo program shows the usage of the functions. These links give the details.
- Information on using the Library
- Github repository for the Arduino software library
- Github repository for the Particle software library
- Github repository for the Raspberry Pi software library
Miscellaneous
Qwiic cables in various lengths are available from Adafruit, Sparkfun, Mouser, Digikey and Amazon.
License Information
Our License Information is here.
Leave a Reply